Crochet V stitch video tutorial. Easy! 

I’ve recently gone back to work after my second lot of maternity leave with these two! 


I find myself getting so ahead for the next day just so we can all leave the house on time and get to work and kids to nurseries it doesn’t leave much sewing time! 

So I decided to use the free time I do have at work on my lunch hour. I took up crochet and I’m loving it! 
I watched a brilliant video on you tube and after my third attempt got it right. 

  
It’s called a v stitch and is really easy because it’s so repetitive. Watch the video here. 

I had a stash of wool from failed knitting attempts years ago and then was given a load of wool from someone at work after asking about crochet. I’m always after a bargain or being frugal 👍🏼 

The blanket has ended up being quite massive now. And as I’m blogging in the sunshine I realise it will be finished just in time for summer!! 

It’s taken me 30 hours so far! 

Jeans to lunch bag

After the big clothes cull of 2015 from mine and my husbands wardrobes I had lots of things to re-use and give a new life!

I’m returning to work next week after a lovely 9 months of maternity leave so I decided to make myself a lunch bag.

To make. 

I used one pair of jeans for this.

1. Cut off one leg so that you have as much material as possible. Just below the crotch. Cut up one of the seams and open out the material. If you have pinking shears use them as the denim frays.


2. Measure out a rectangle 25 inches including 2 inch for hemming both short ends. Cut out.

3. On one short side fold over a quarter inch, press, and another quarter and pin. Top stitch along using a corresponding colour thread.

4. To make the loop for the button or toggle measure out a piece of material 1 X 5 inches.

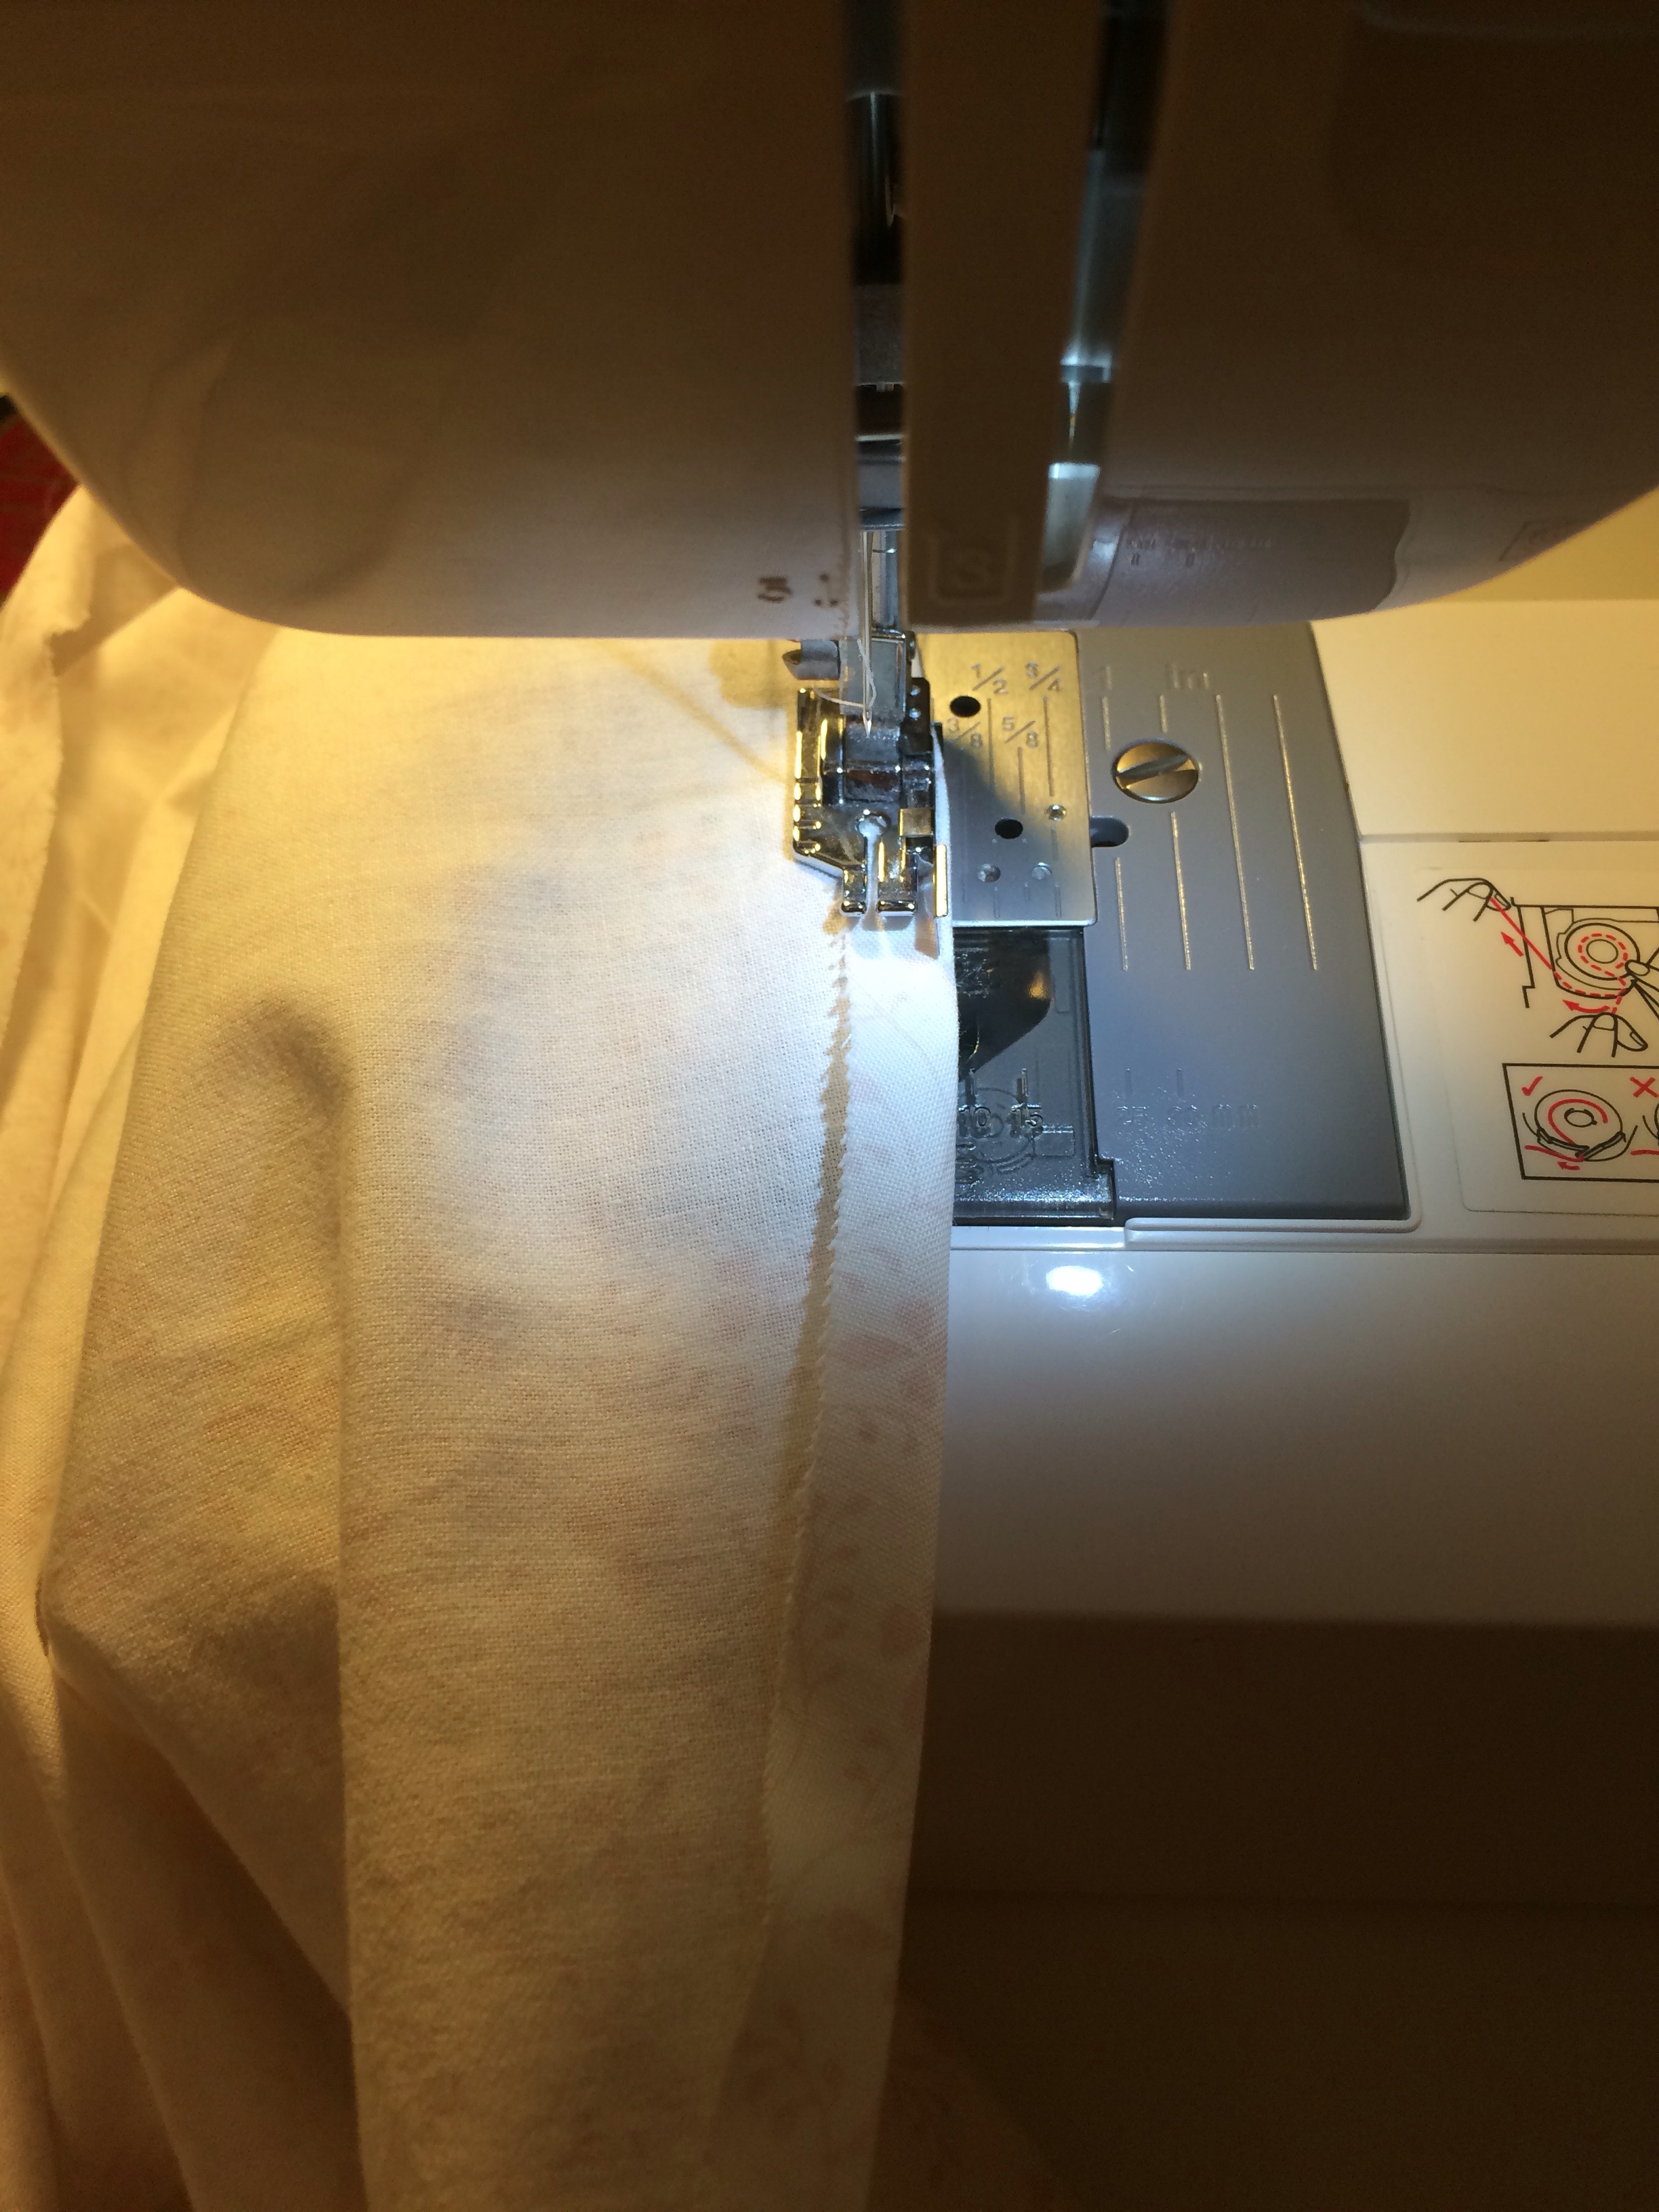
5. Fold the strip in half, press for the centre line and open.  Fold the two edges into the middle, press. Fold the two edges into the middle, press and pin.

Sew along the long side as close to the open side as you can. It’s quite fiddly! (You could always cut a hair elastic and use that instead!)


Cut to just under 3inches. And it’s ready. (It’s easier to stitch if its longer first)

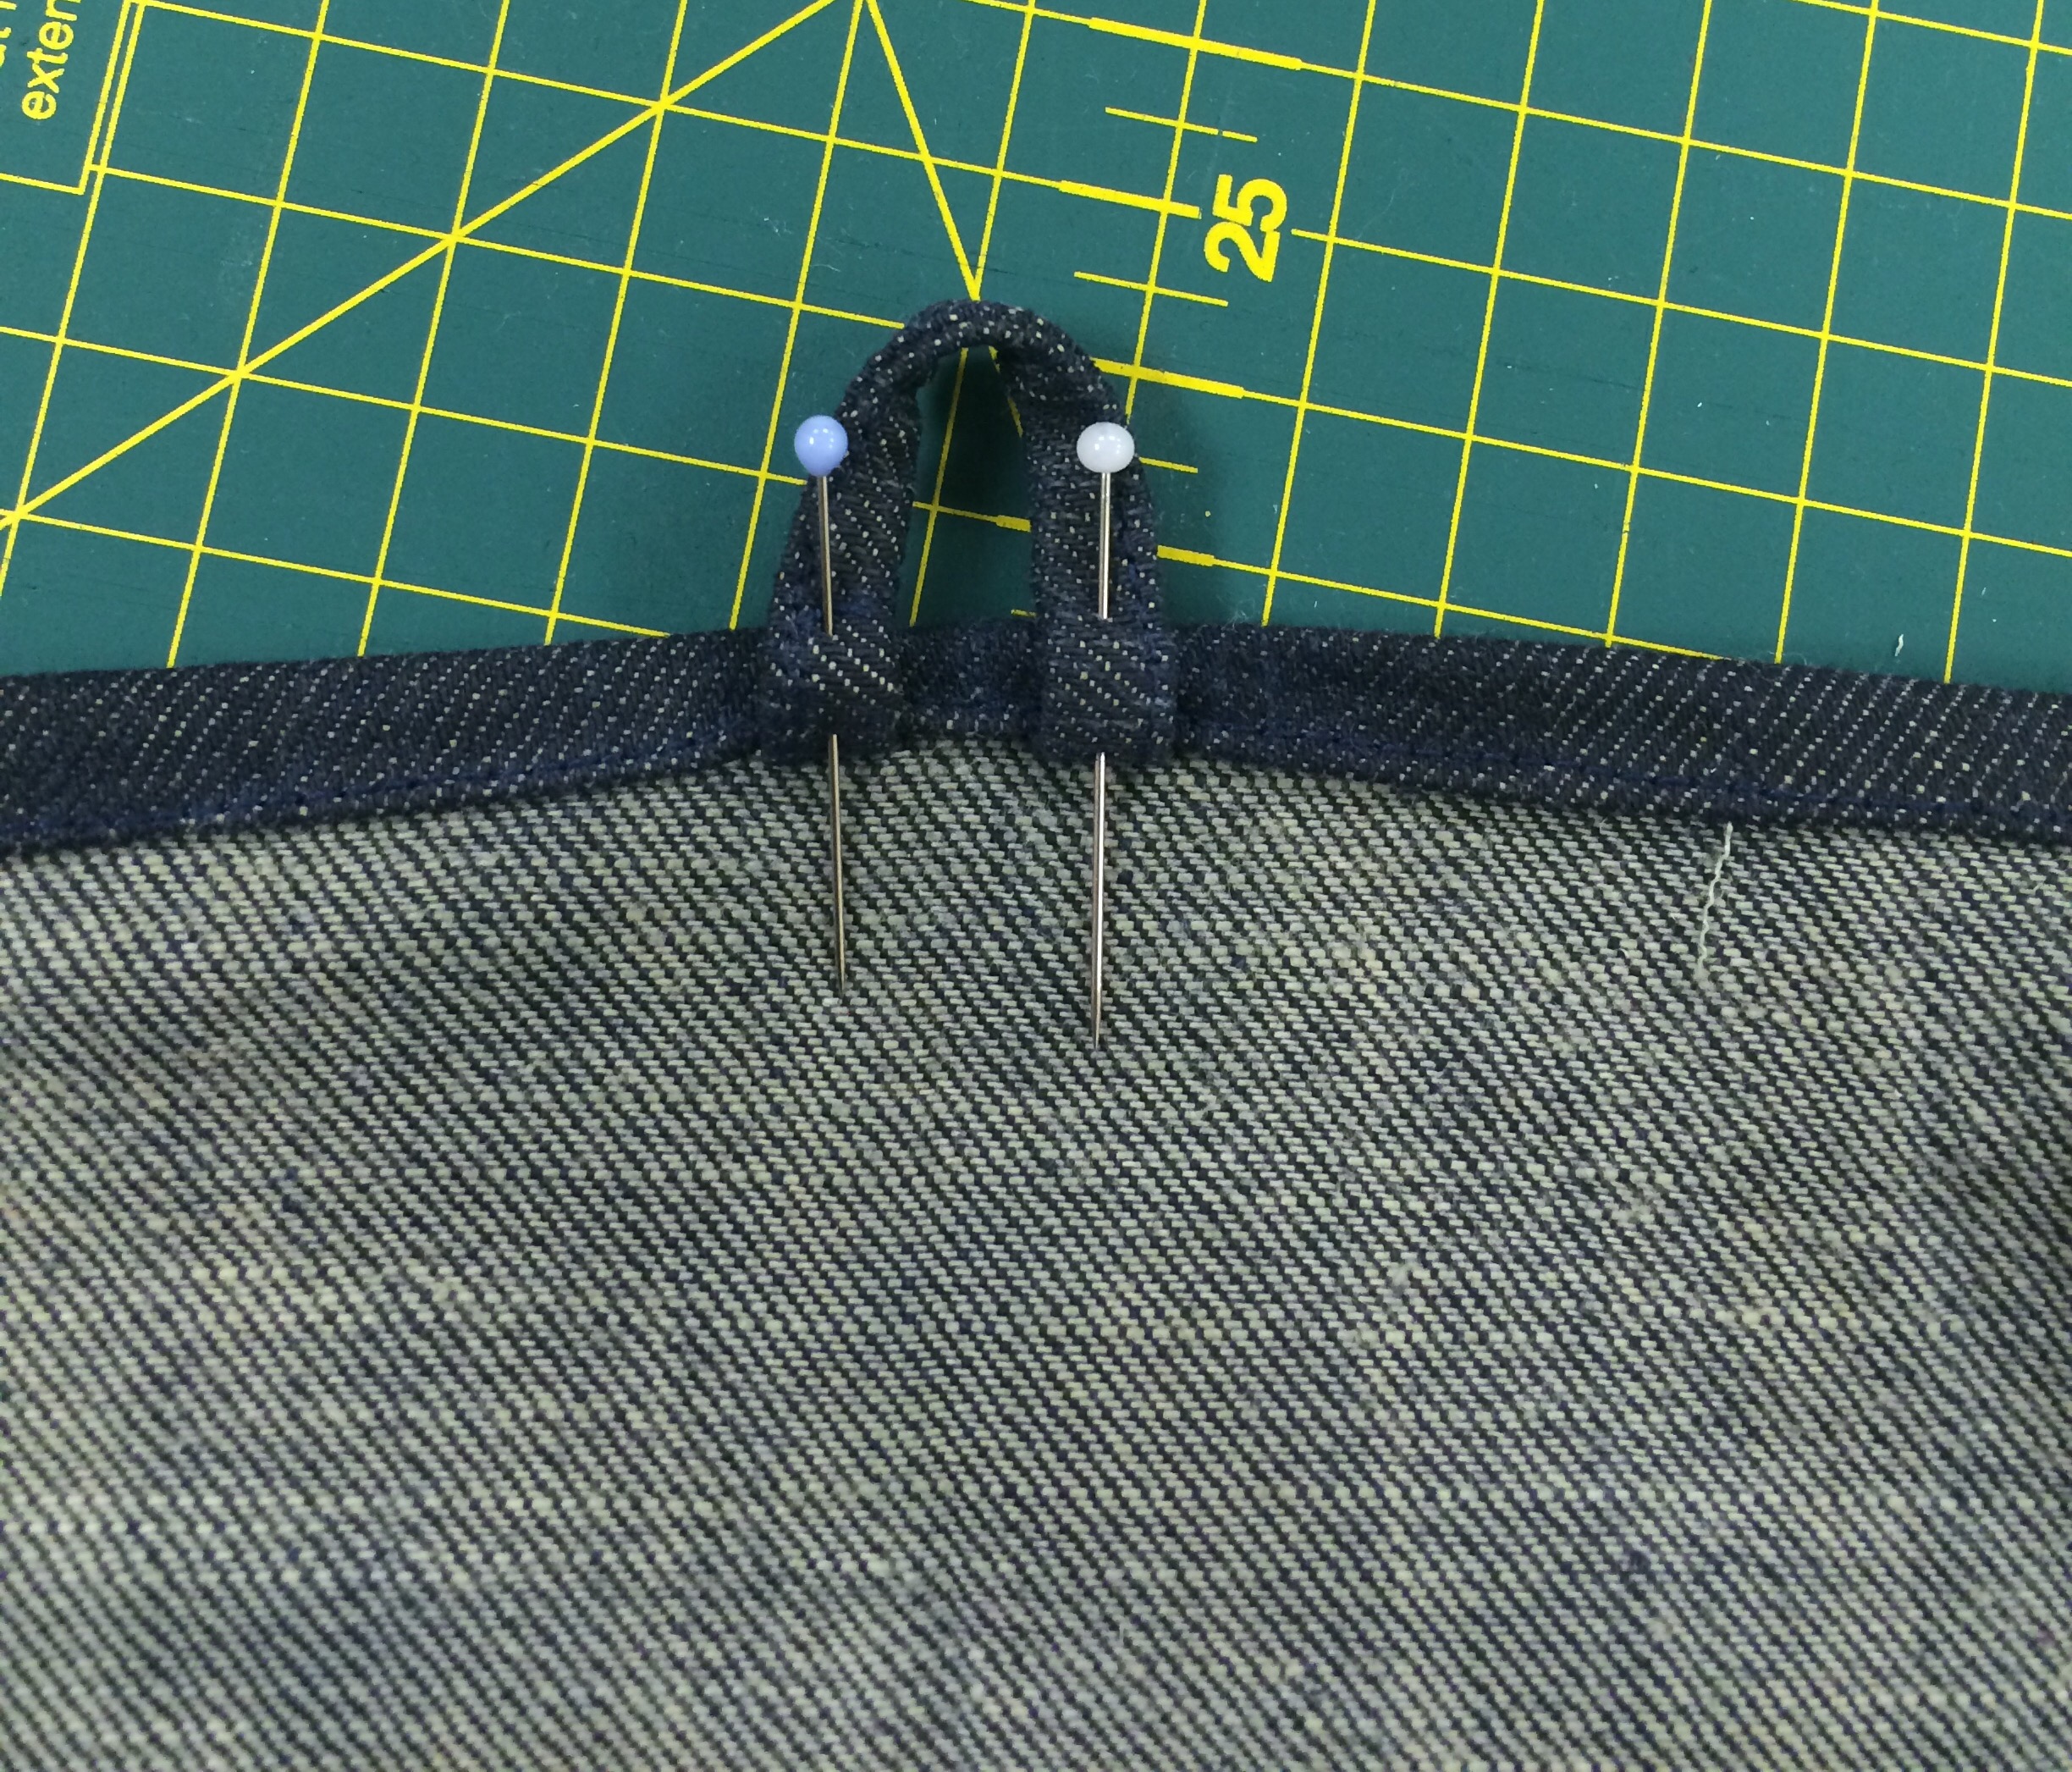
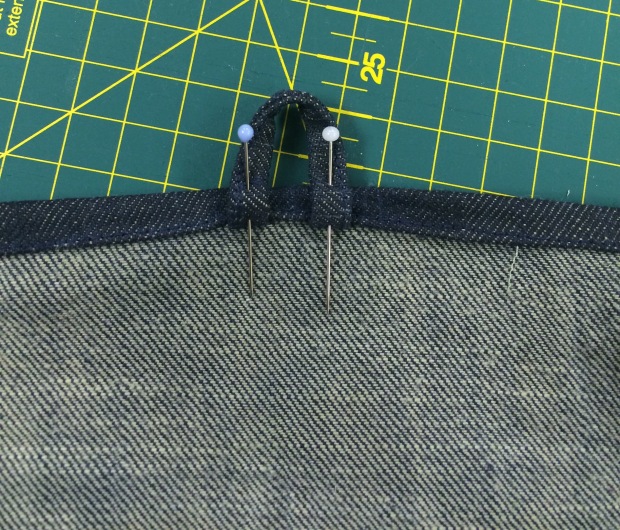
6. Fold over a quarter inch, and another for the hem as before. Press and pin. Fold your rectangle and measure where the centre is. Place your loop either side of the line under the folded hem.  

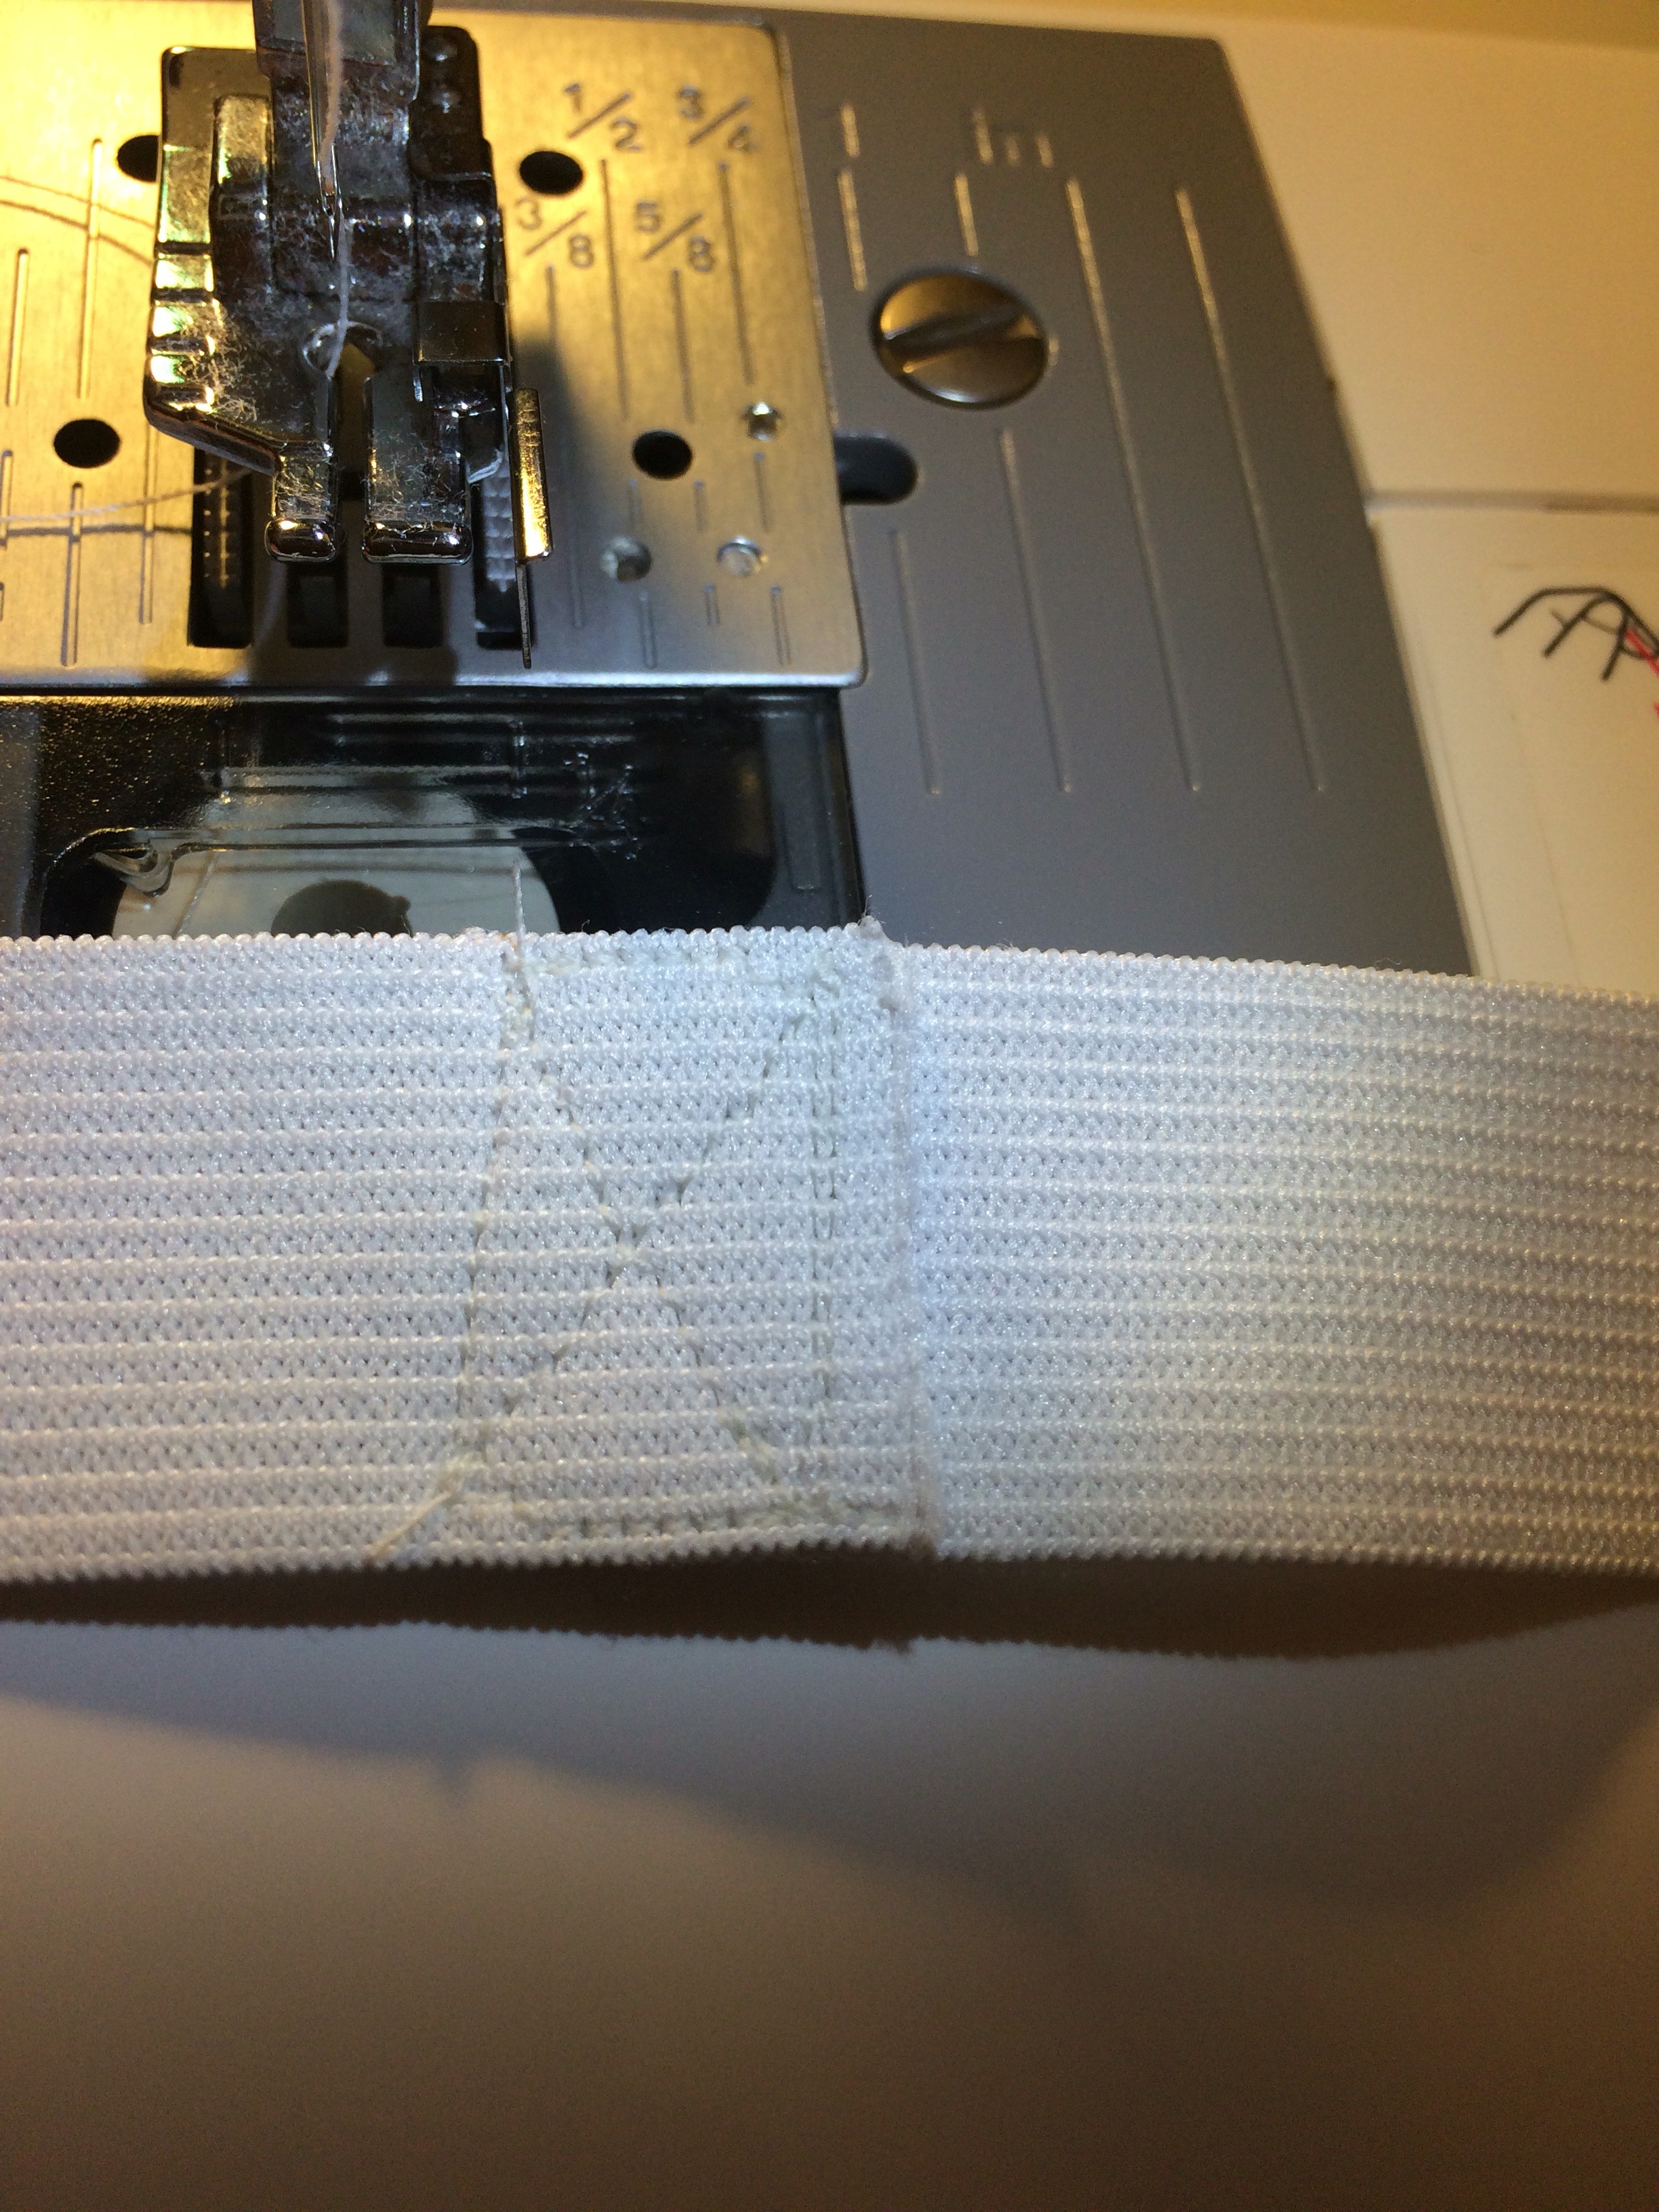
7. Sew along the line. There is a lot of thick fabric here so go slowly.

8.  Fold the loop upwards and pin. Sew over it again. My machine wasn’t up for this much fabric so I did it by hand.


9. Cut the other leg and open as before. For the sides of the bag I used the inside denim on the outside for a bit of variety.

10. Cut two strips 25″ by 2 and a half” for the side panels.  

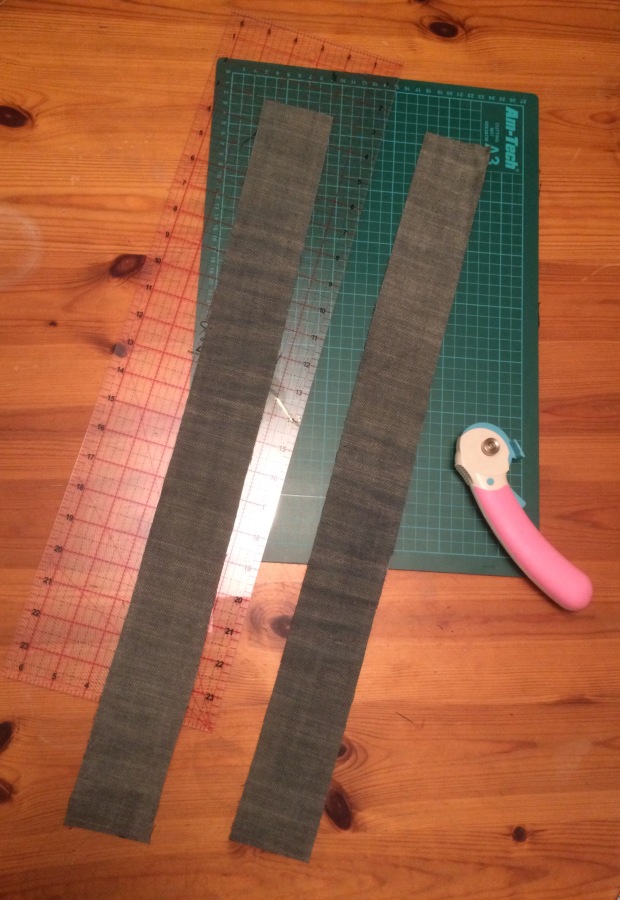
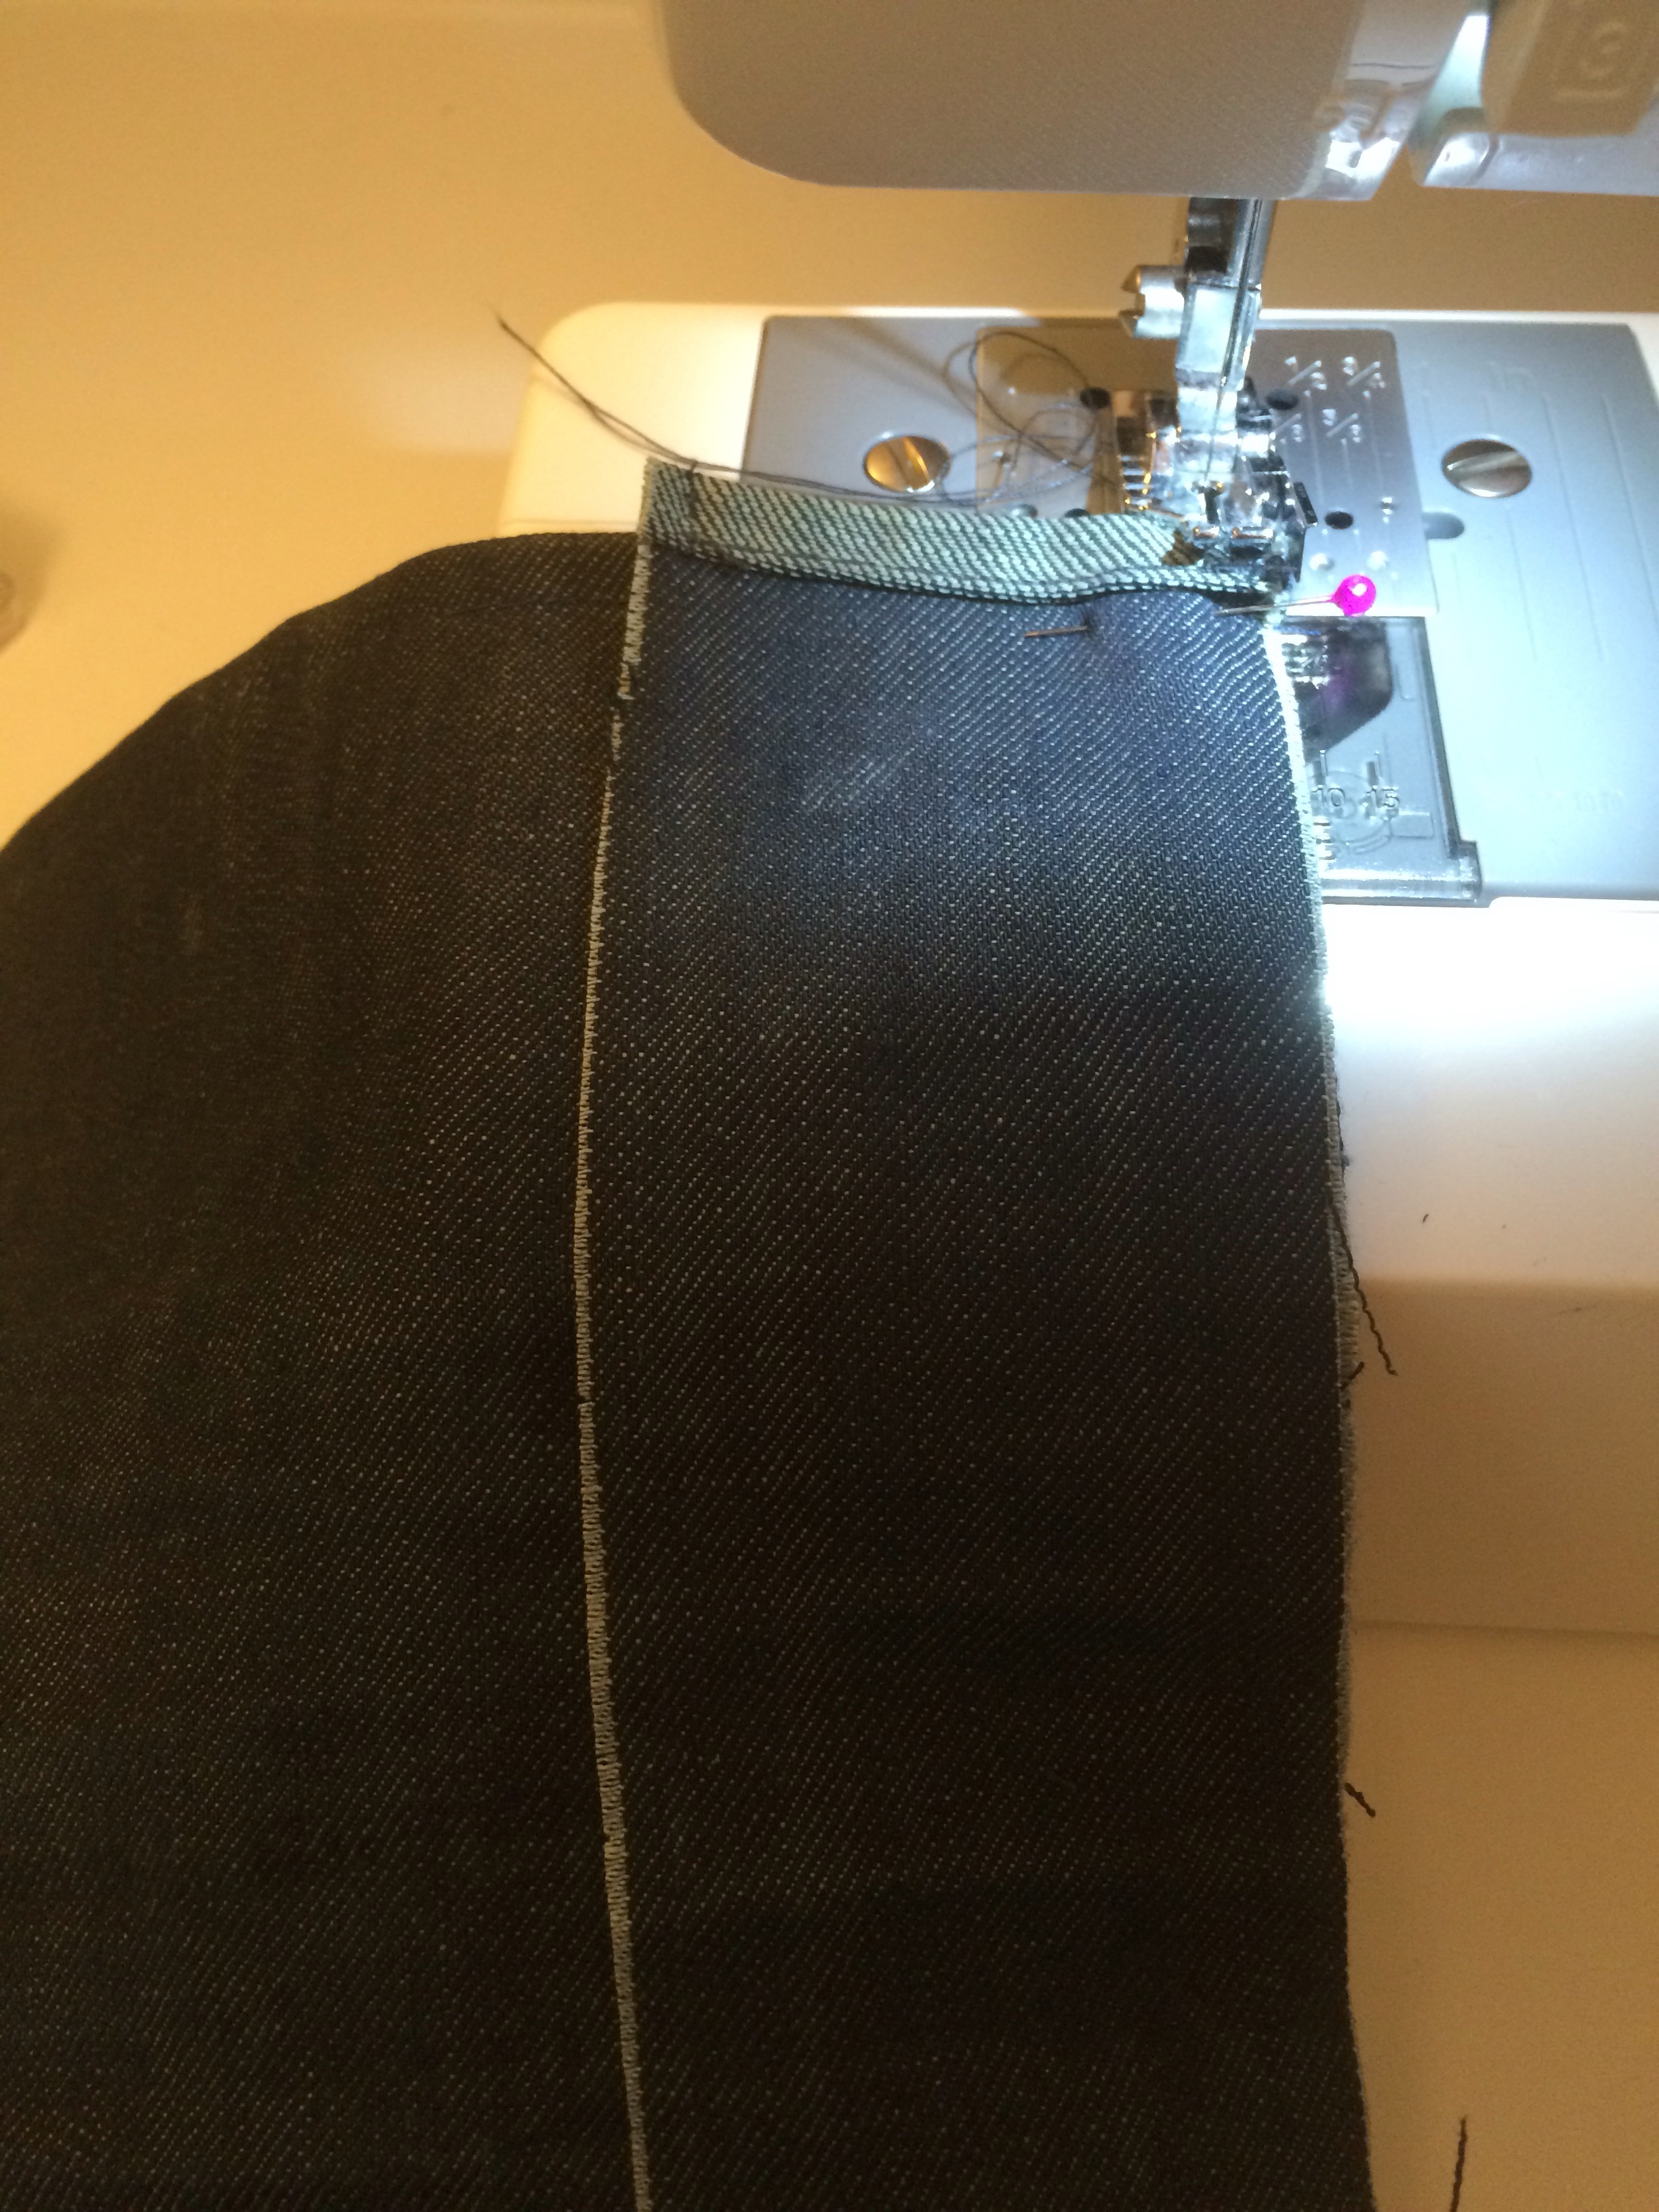
11. Fold up each short end a quarter of an inch, press, then another quarter, press and pin. Check they measure up alongside the other part. Adjust hems if a little bit short. Top stitch all 4 ends. I’m using the inside of the jeans as the outside colour fabric on the bag, so remember to fold right side down!  

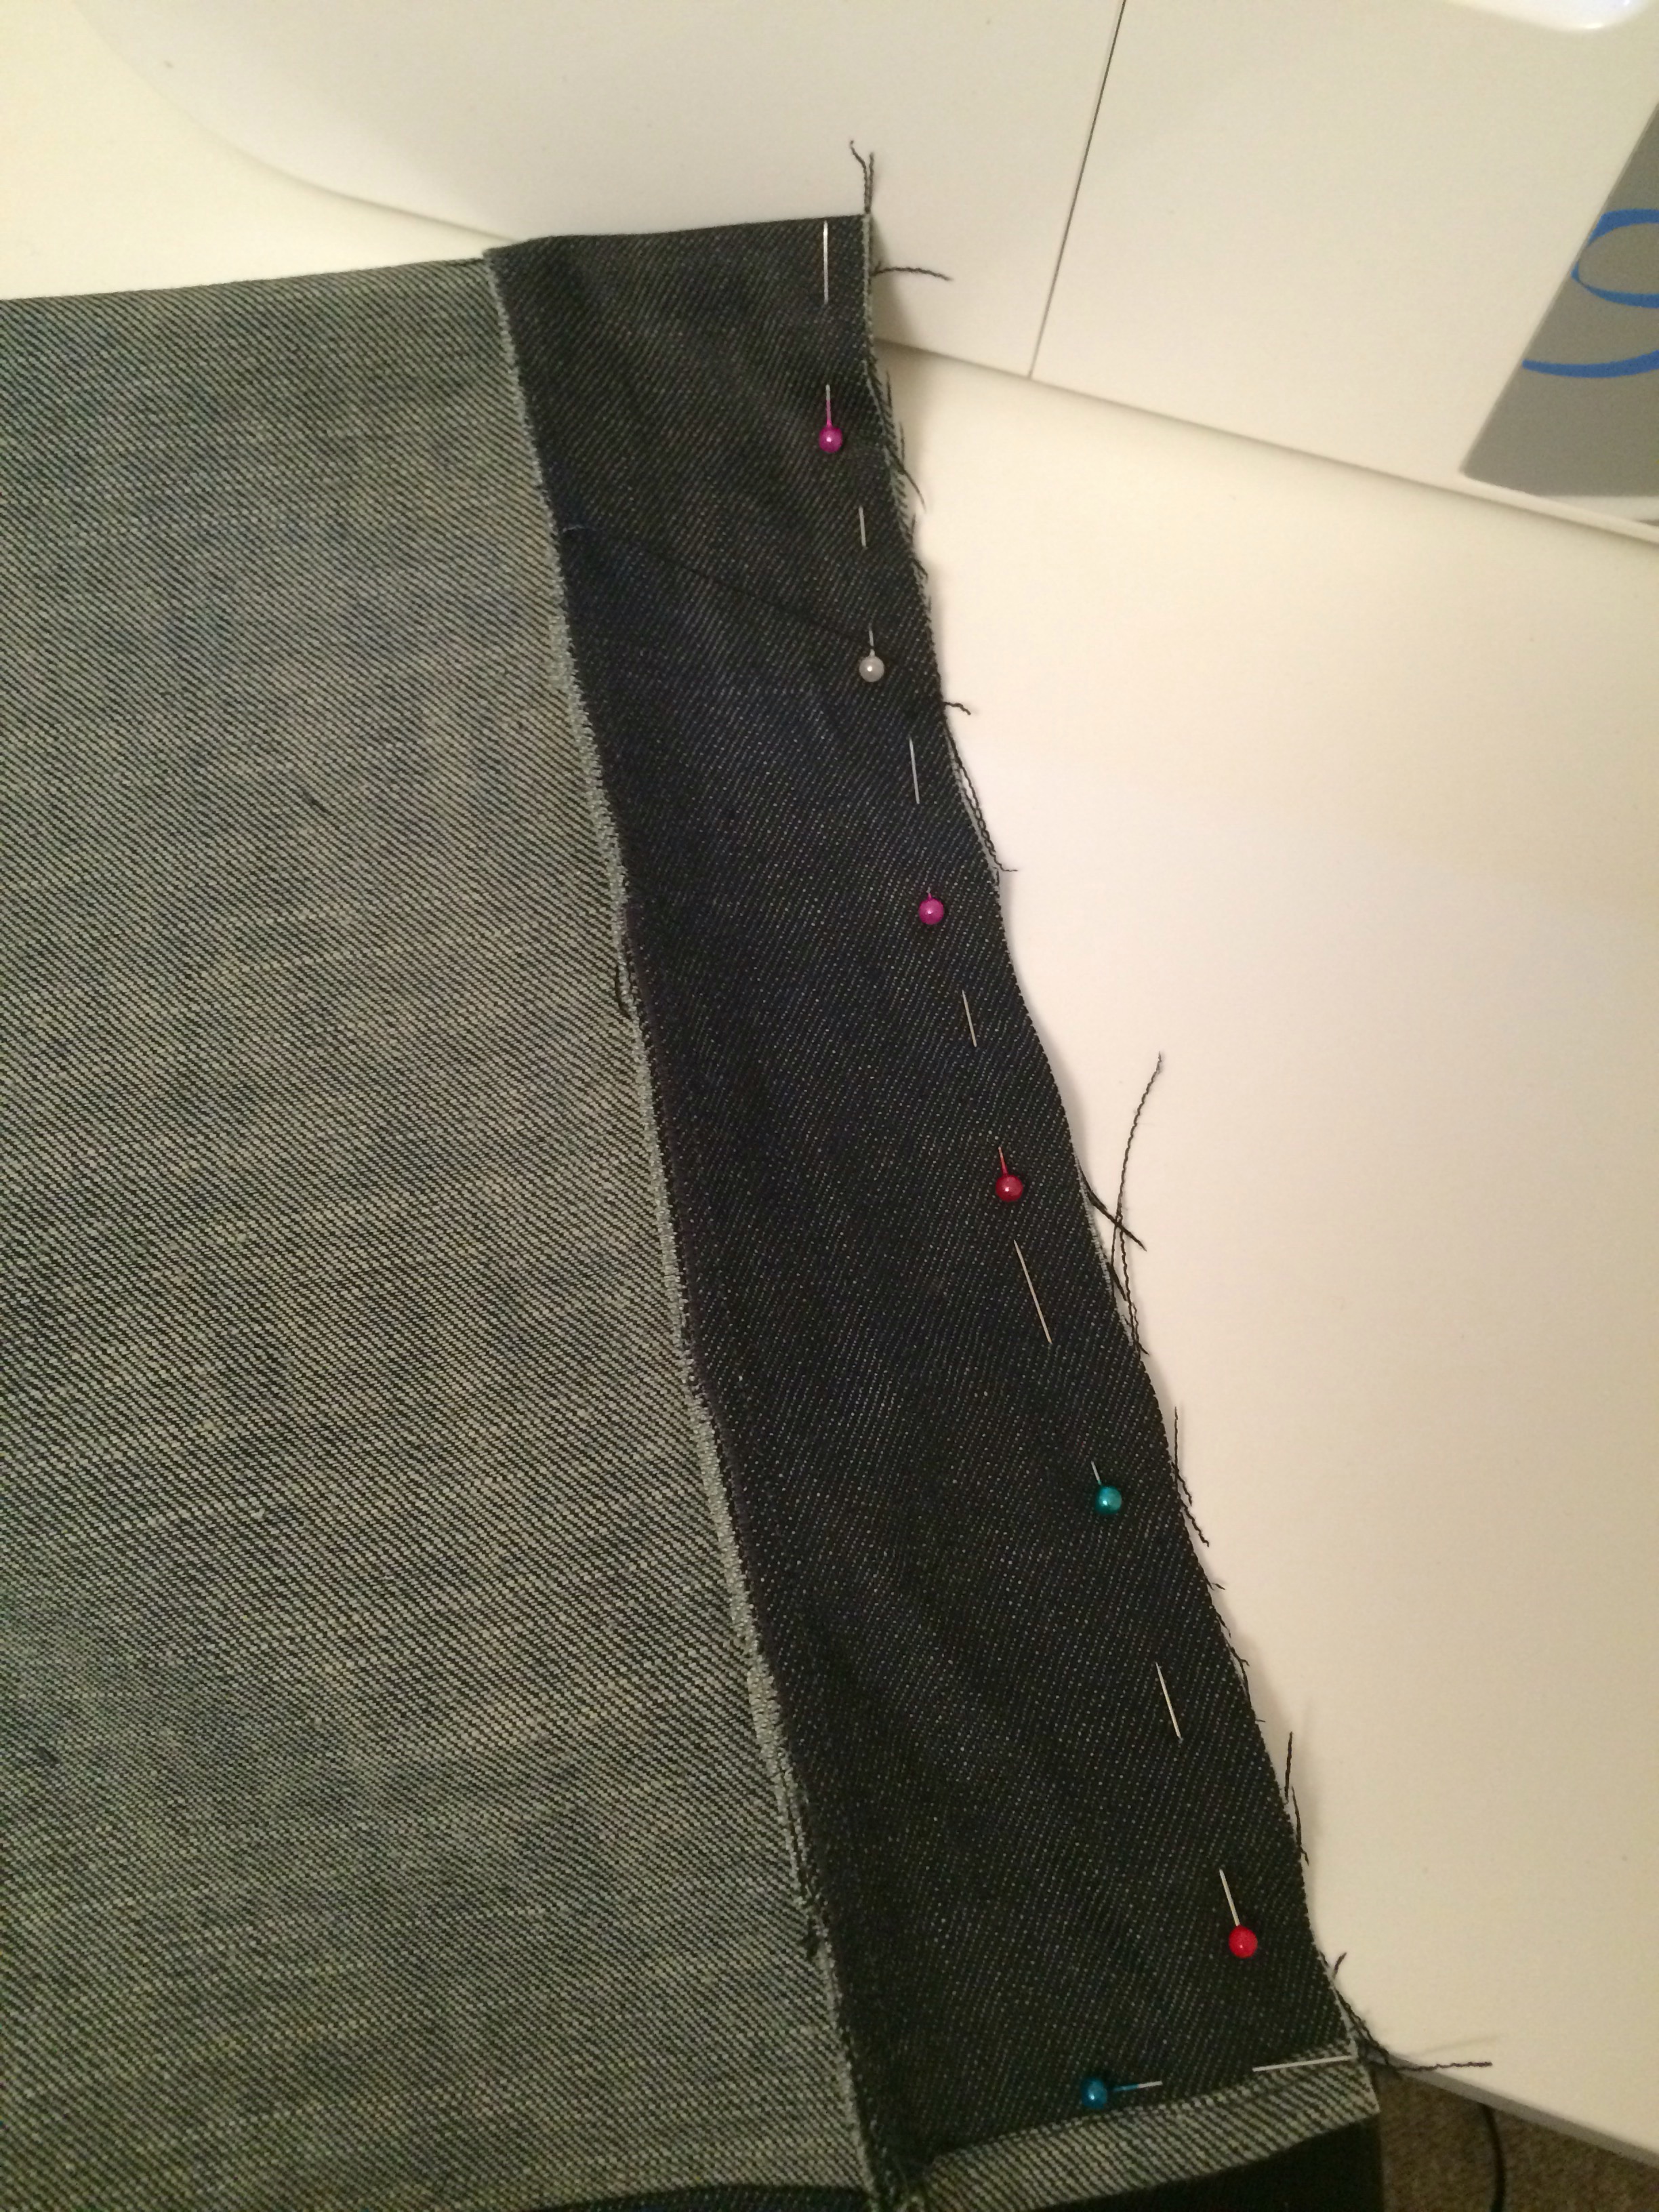
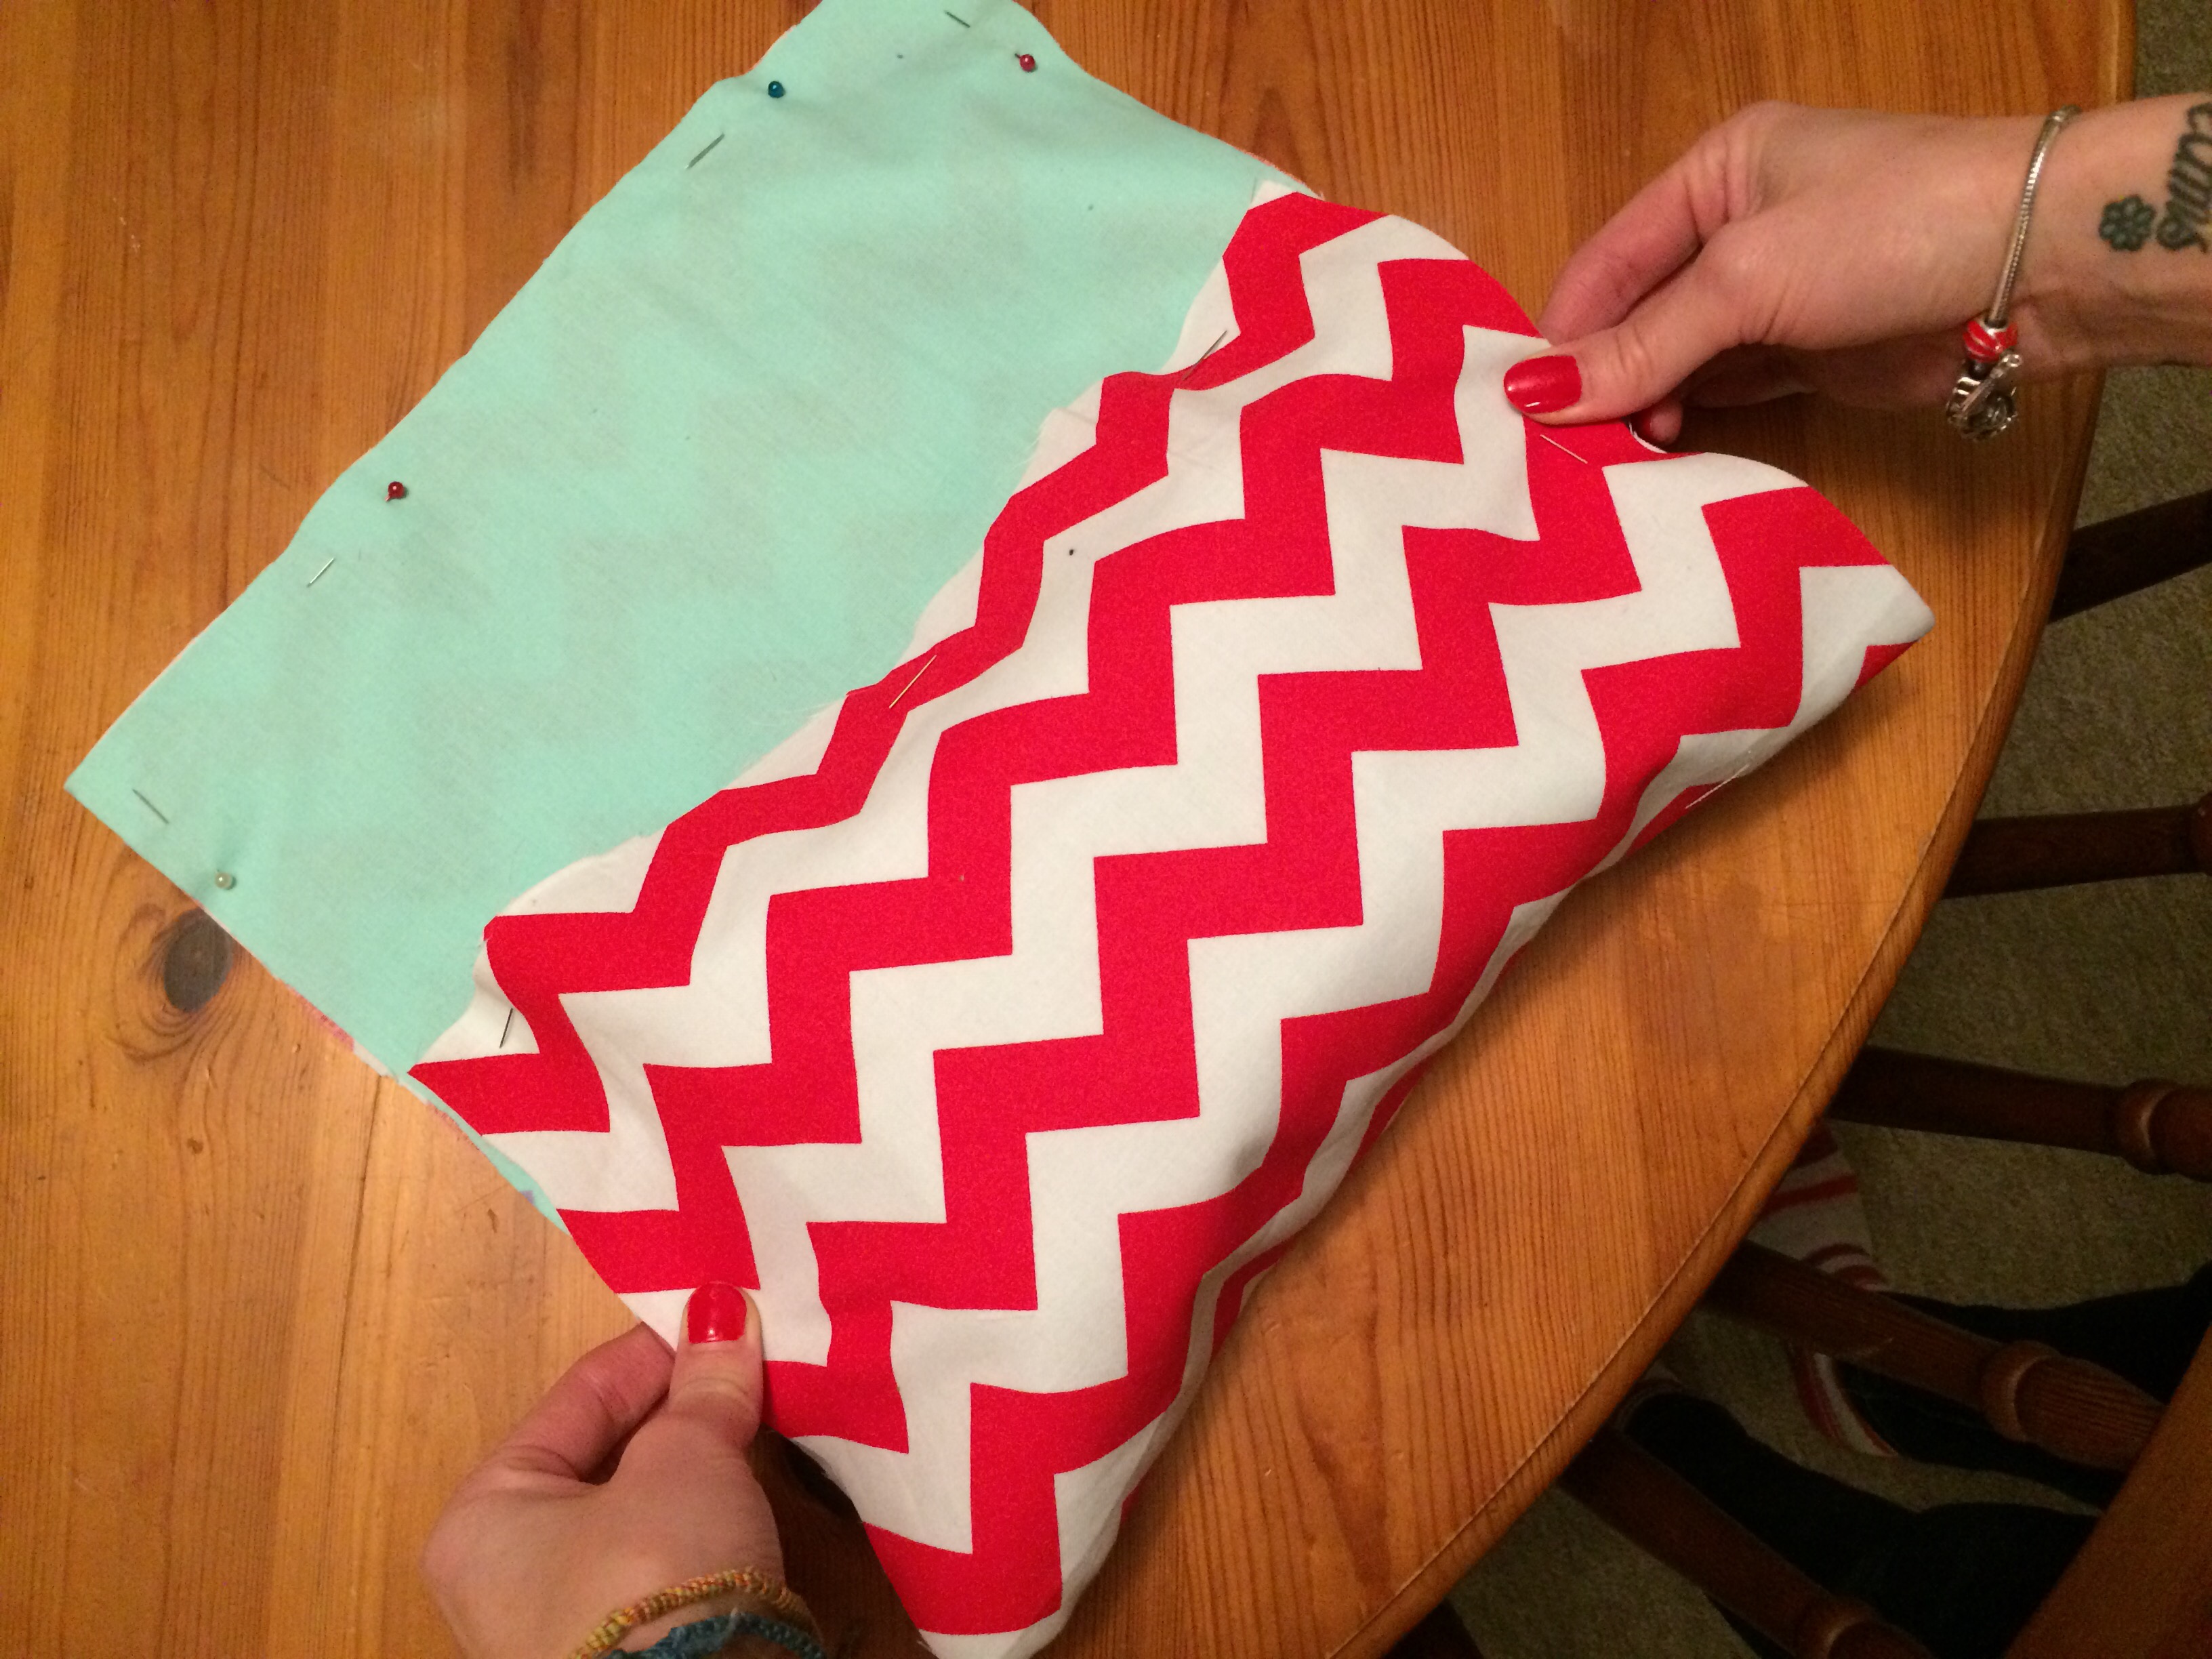
12. Decide if you want the inside colour of the outside denim for your side pannels. I’ve chosen the inside, so lay your fabric strips like this, lining up the edges and pinning as you go.  

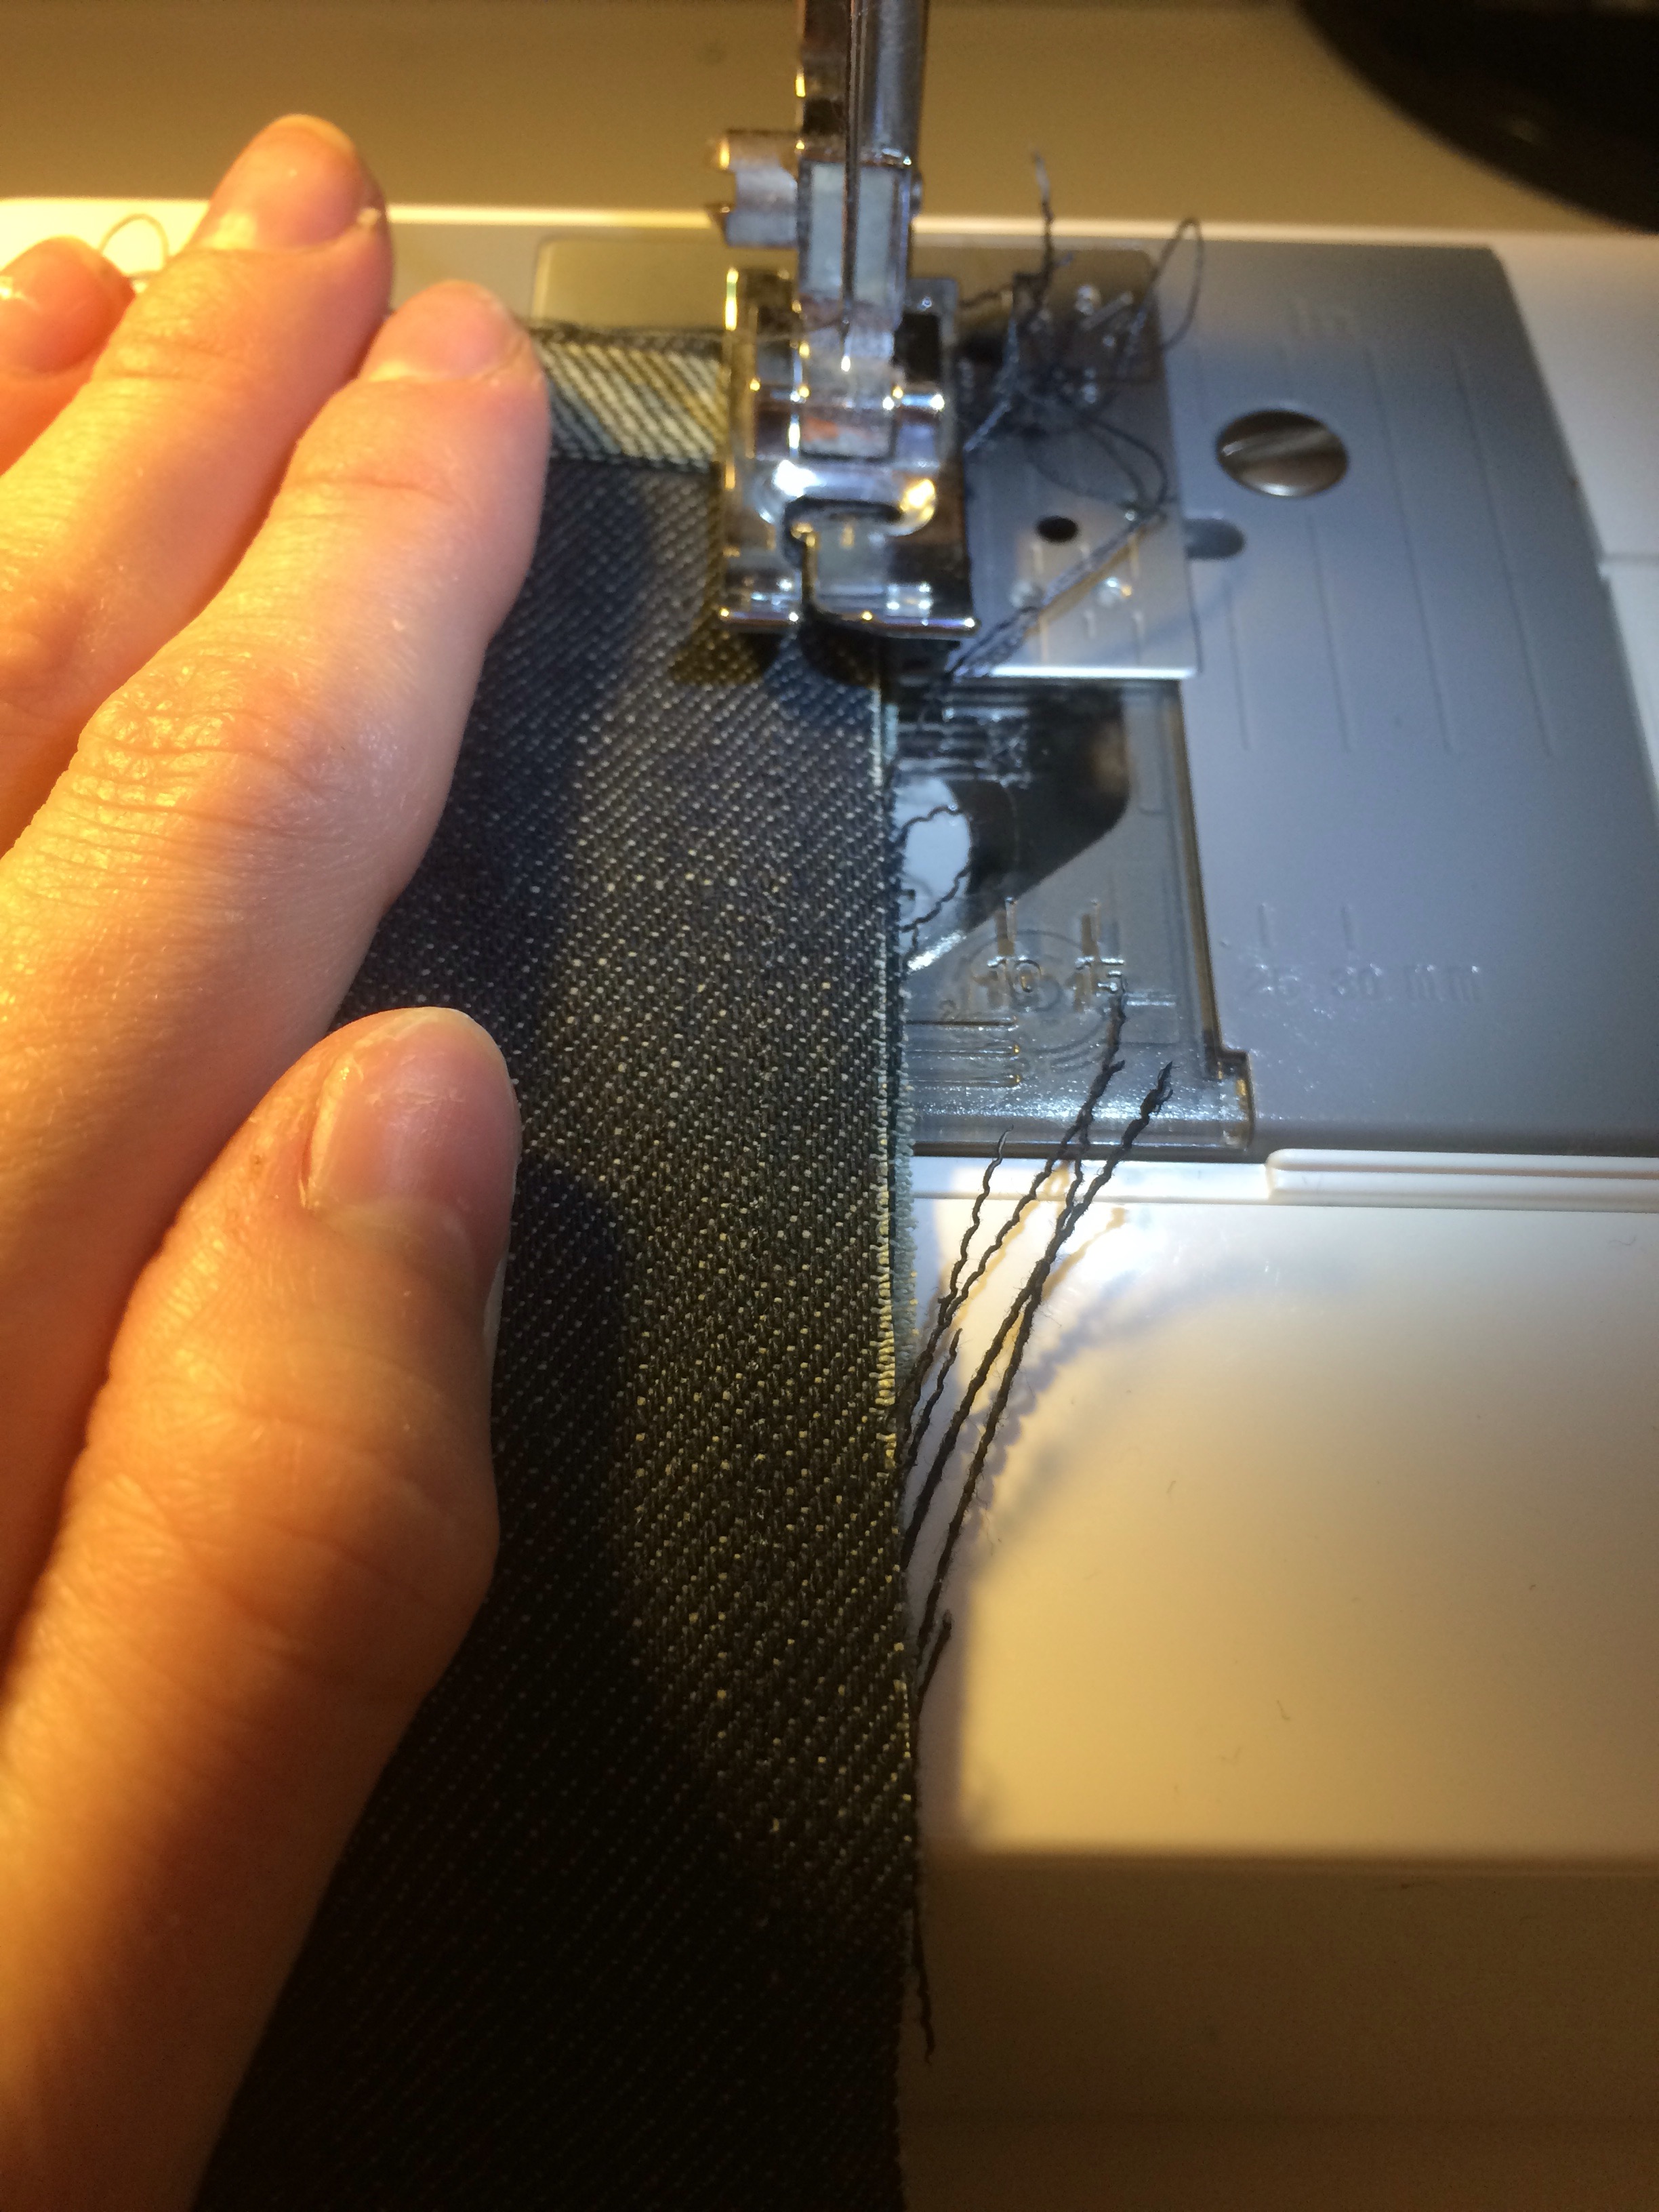
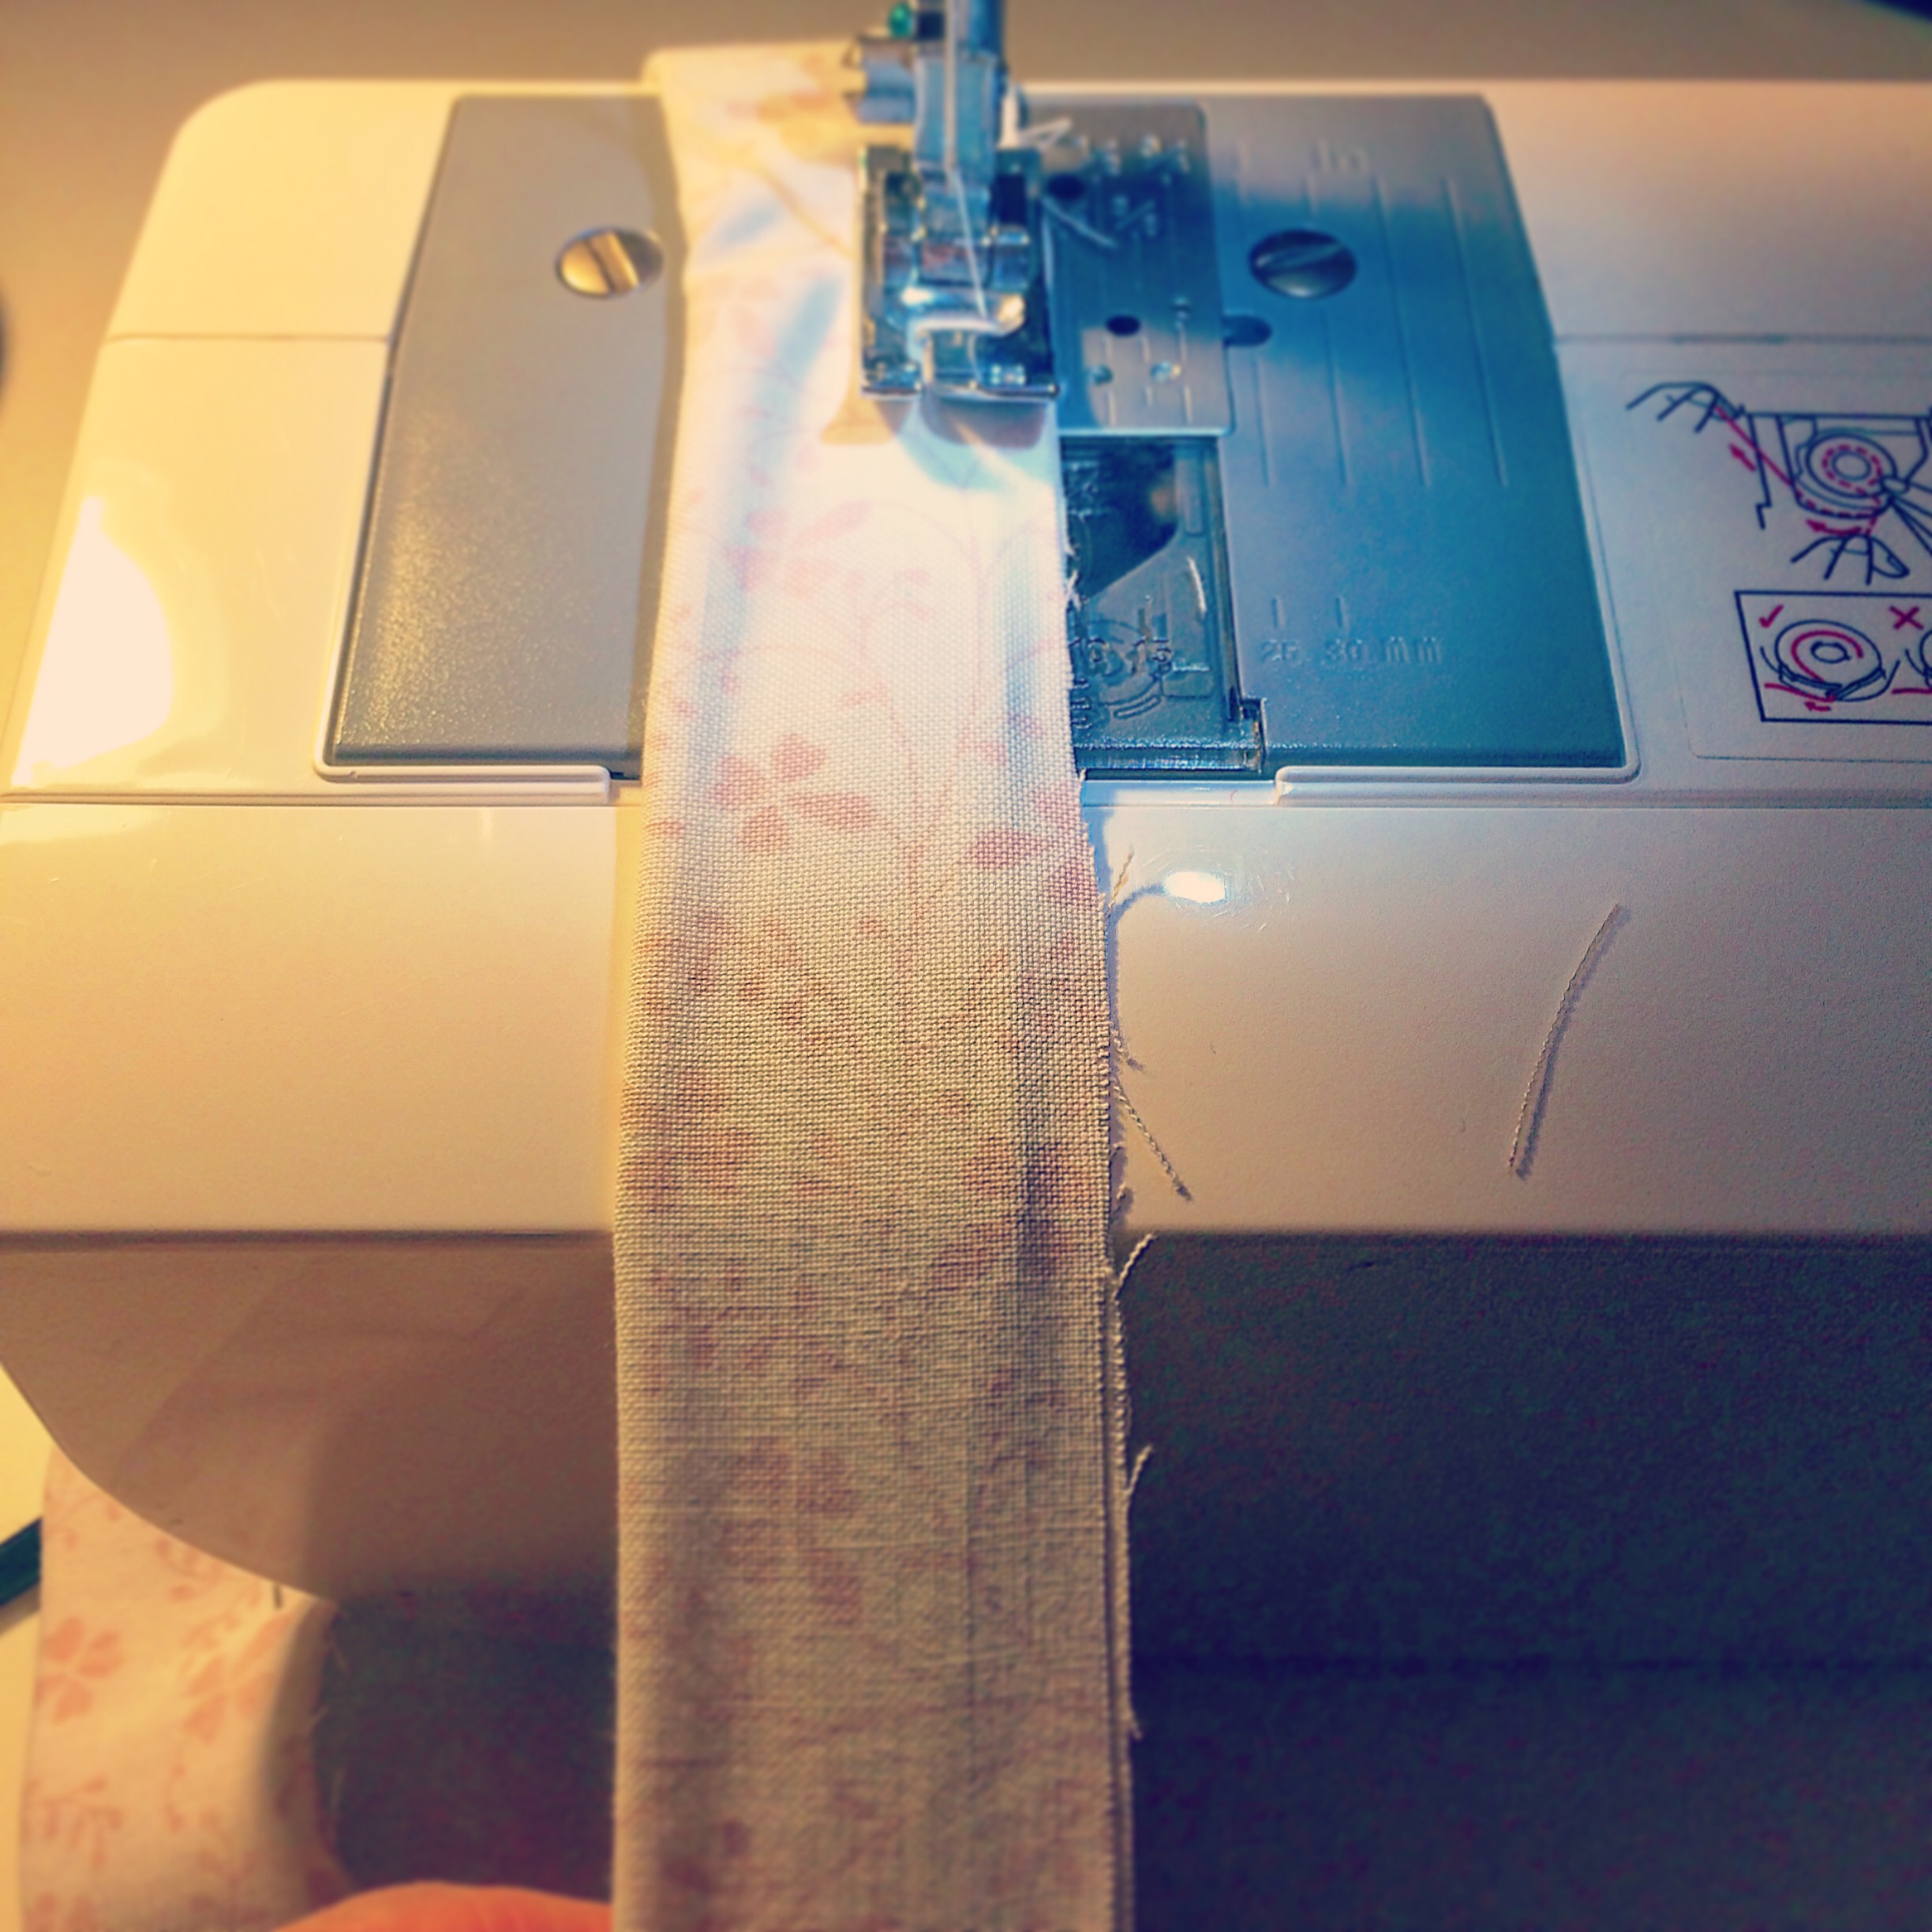
13. Zig zag stitch along the edge of both sides to help stop fraying on the inside of the bag.  

14. Cut off any loose threads.

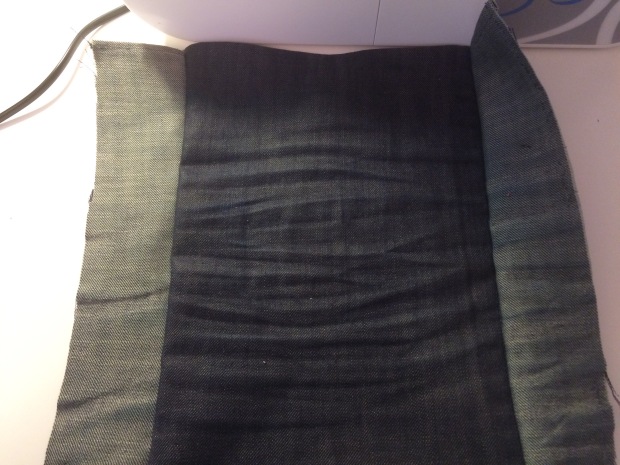
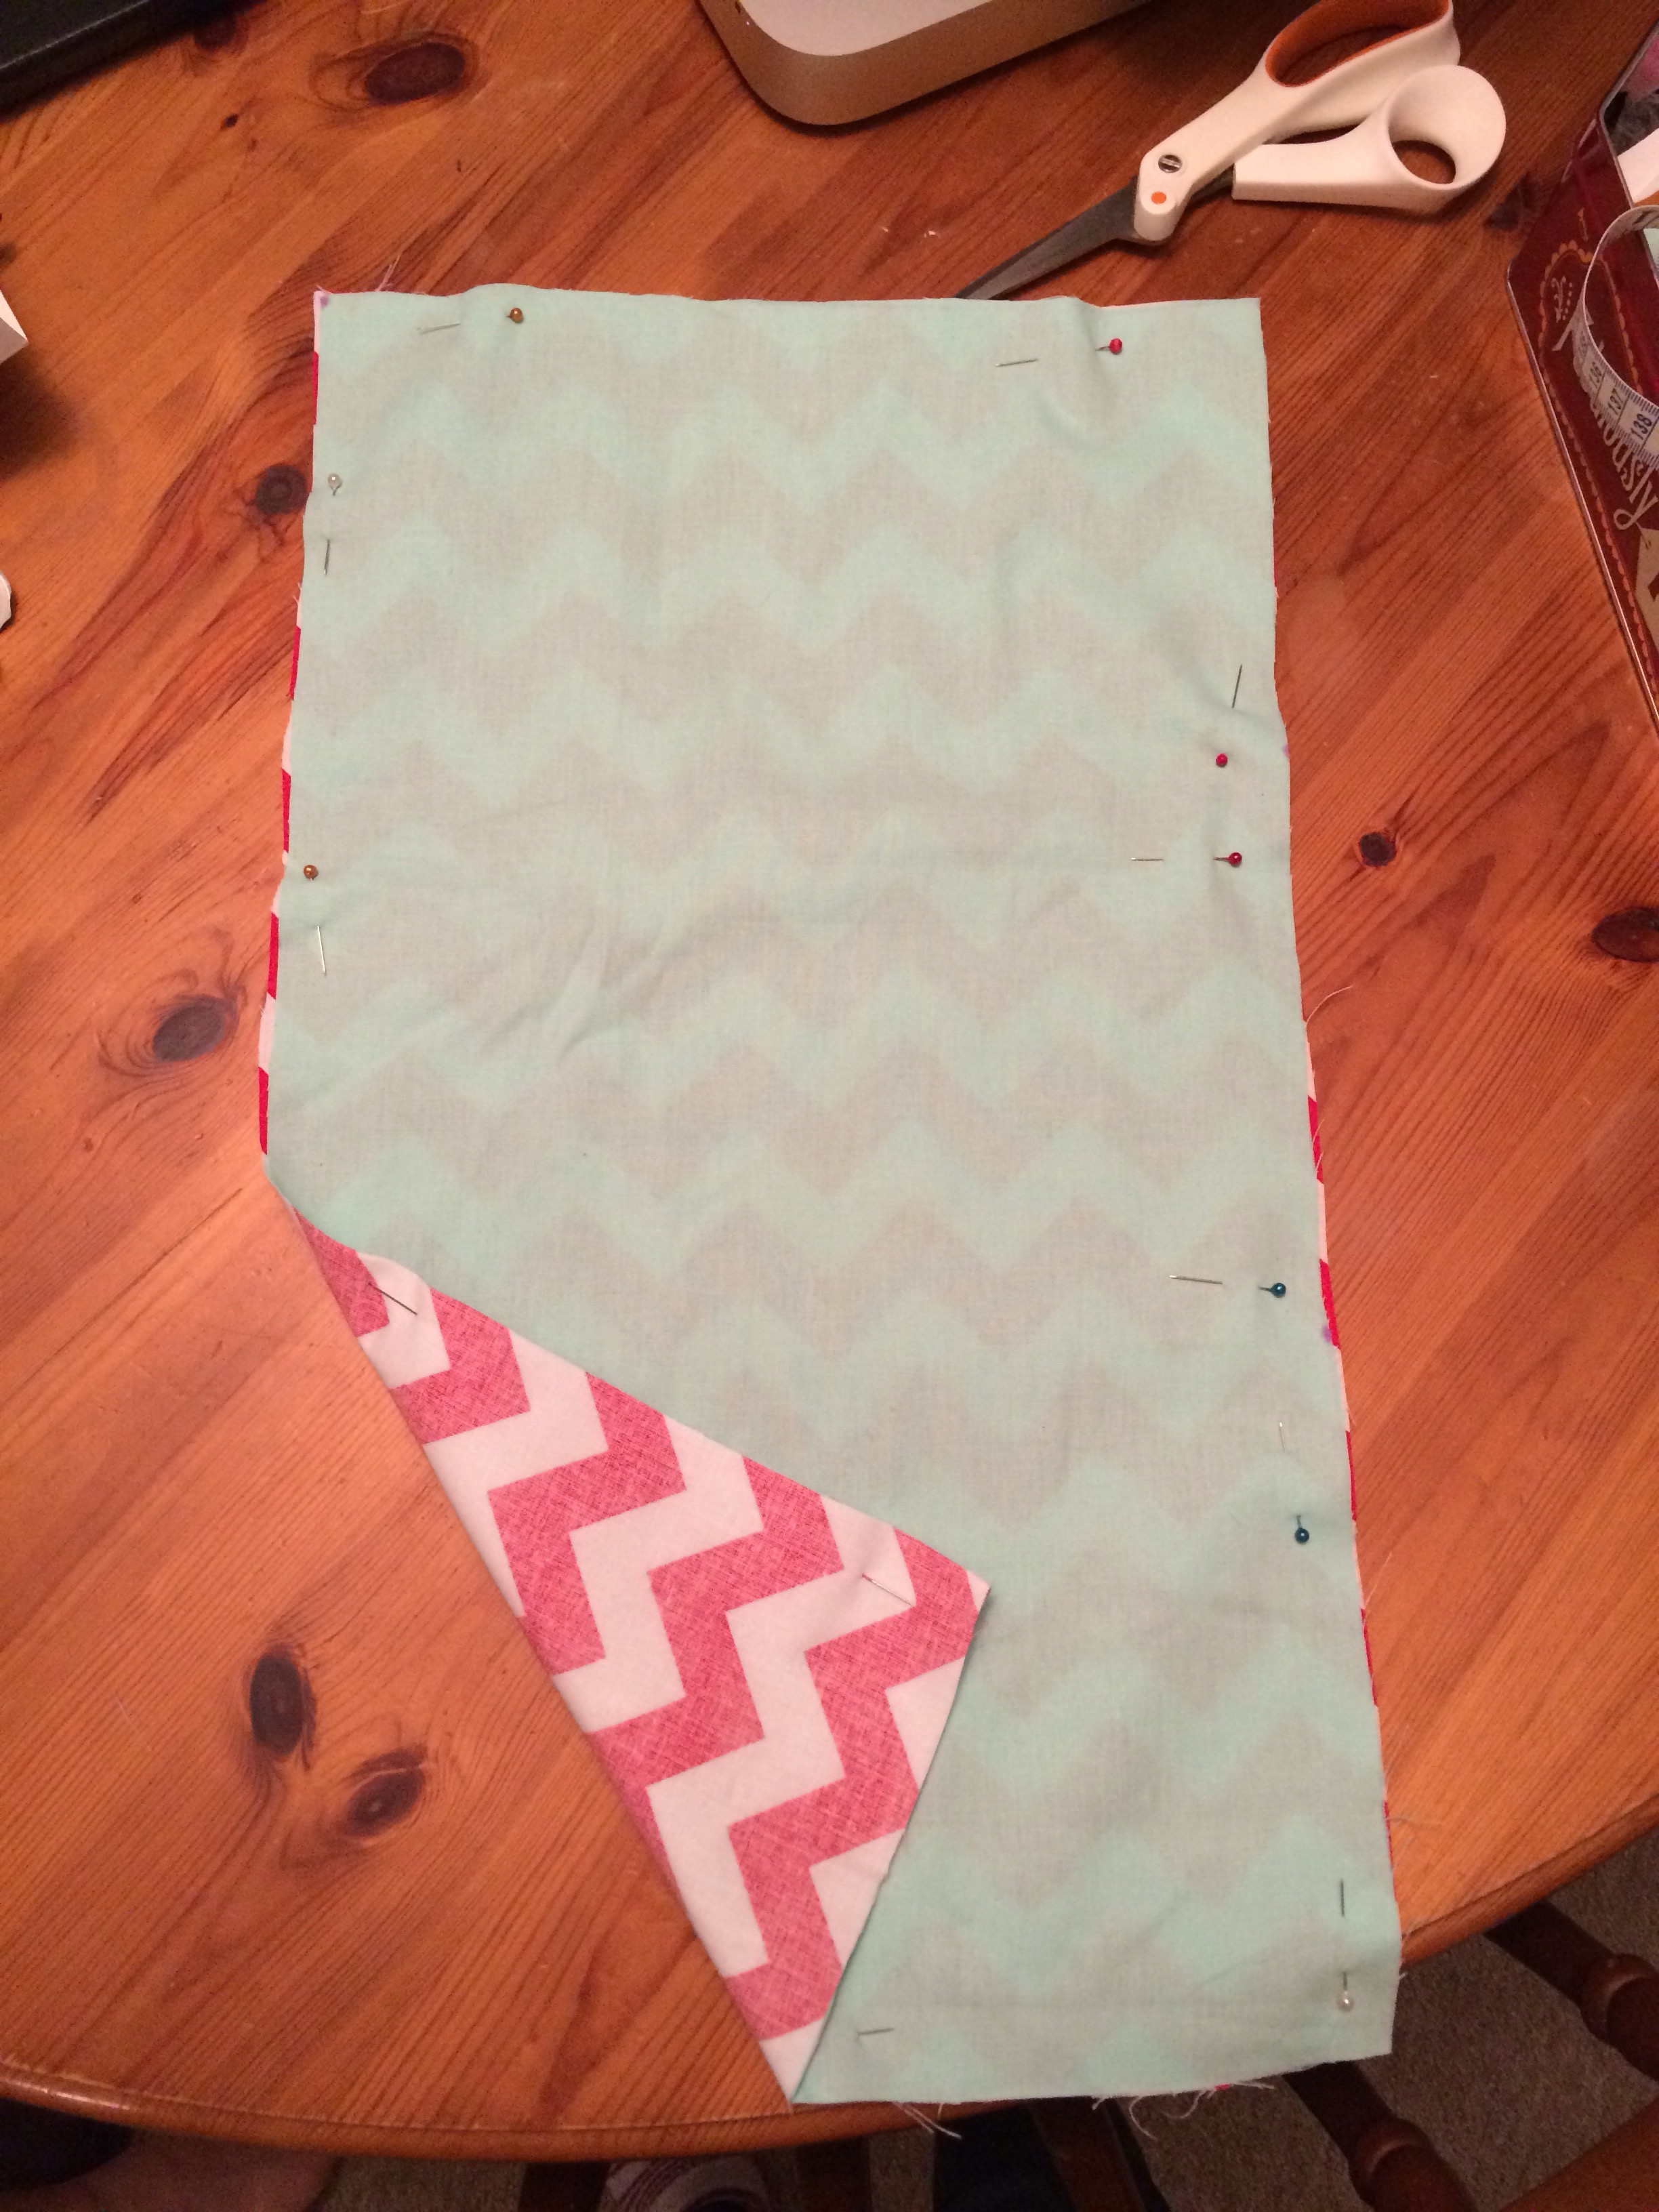
15.  Fold in half, right sides together and pin. Sew with a zig zag stitch on both sides.


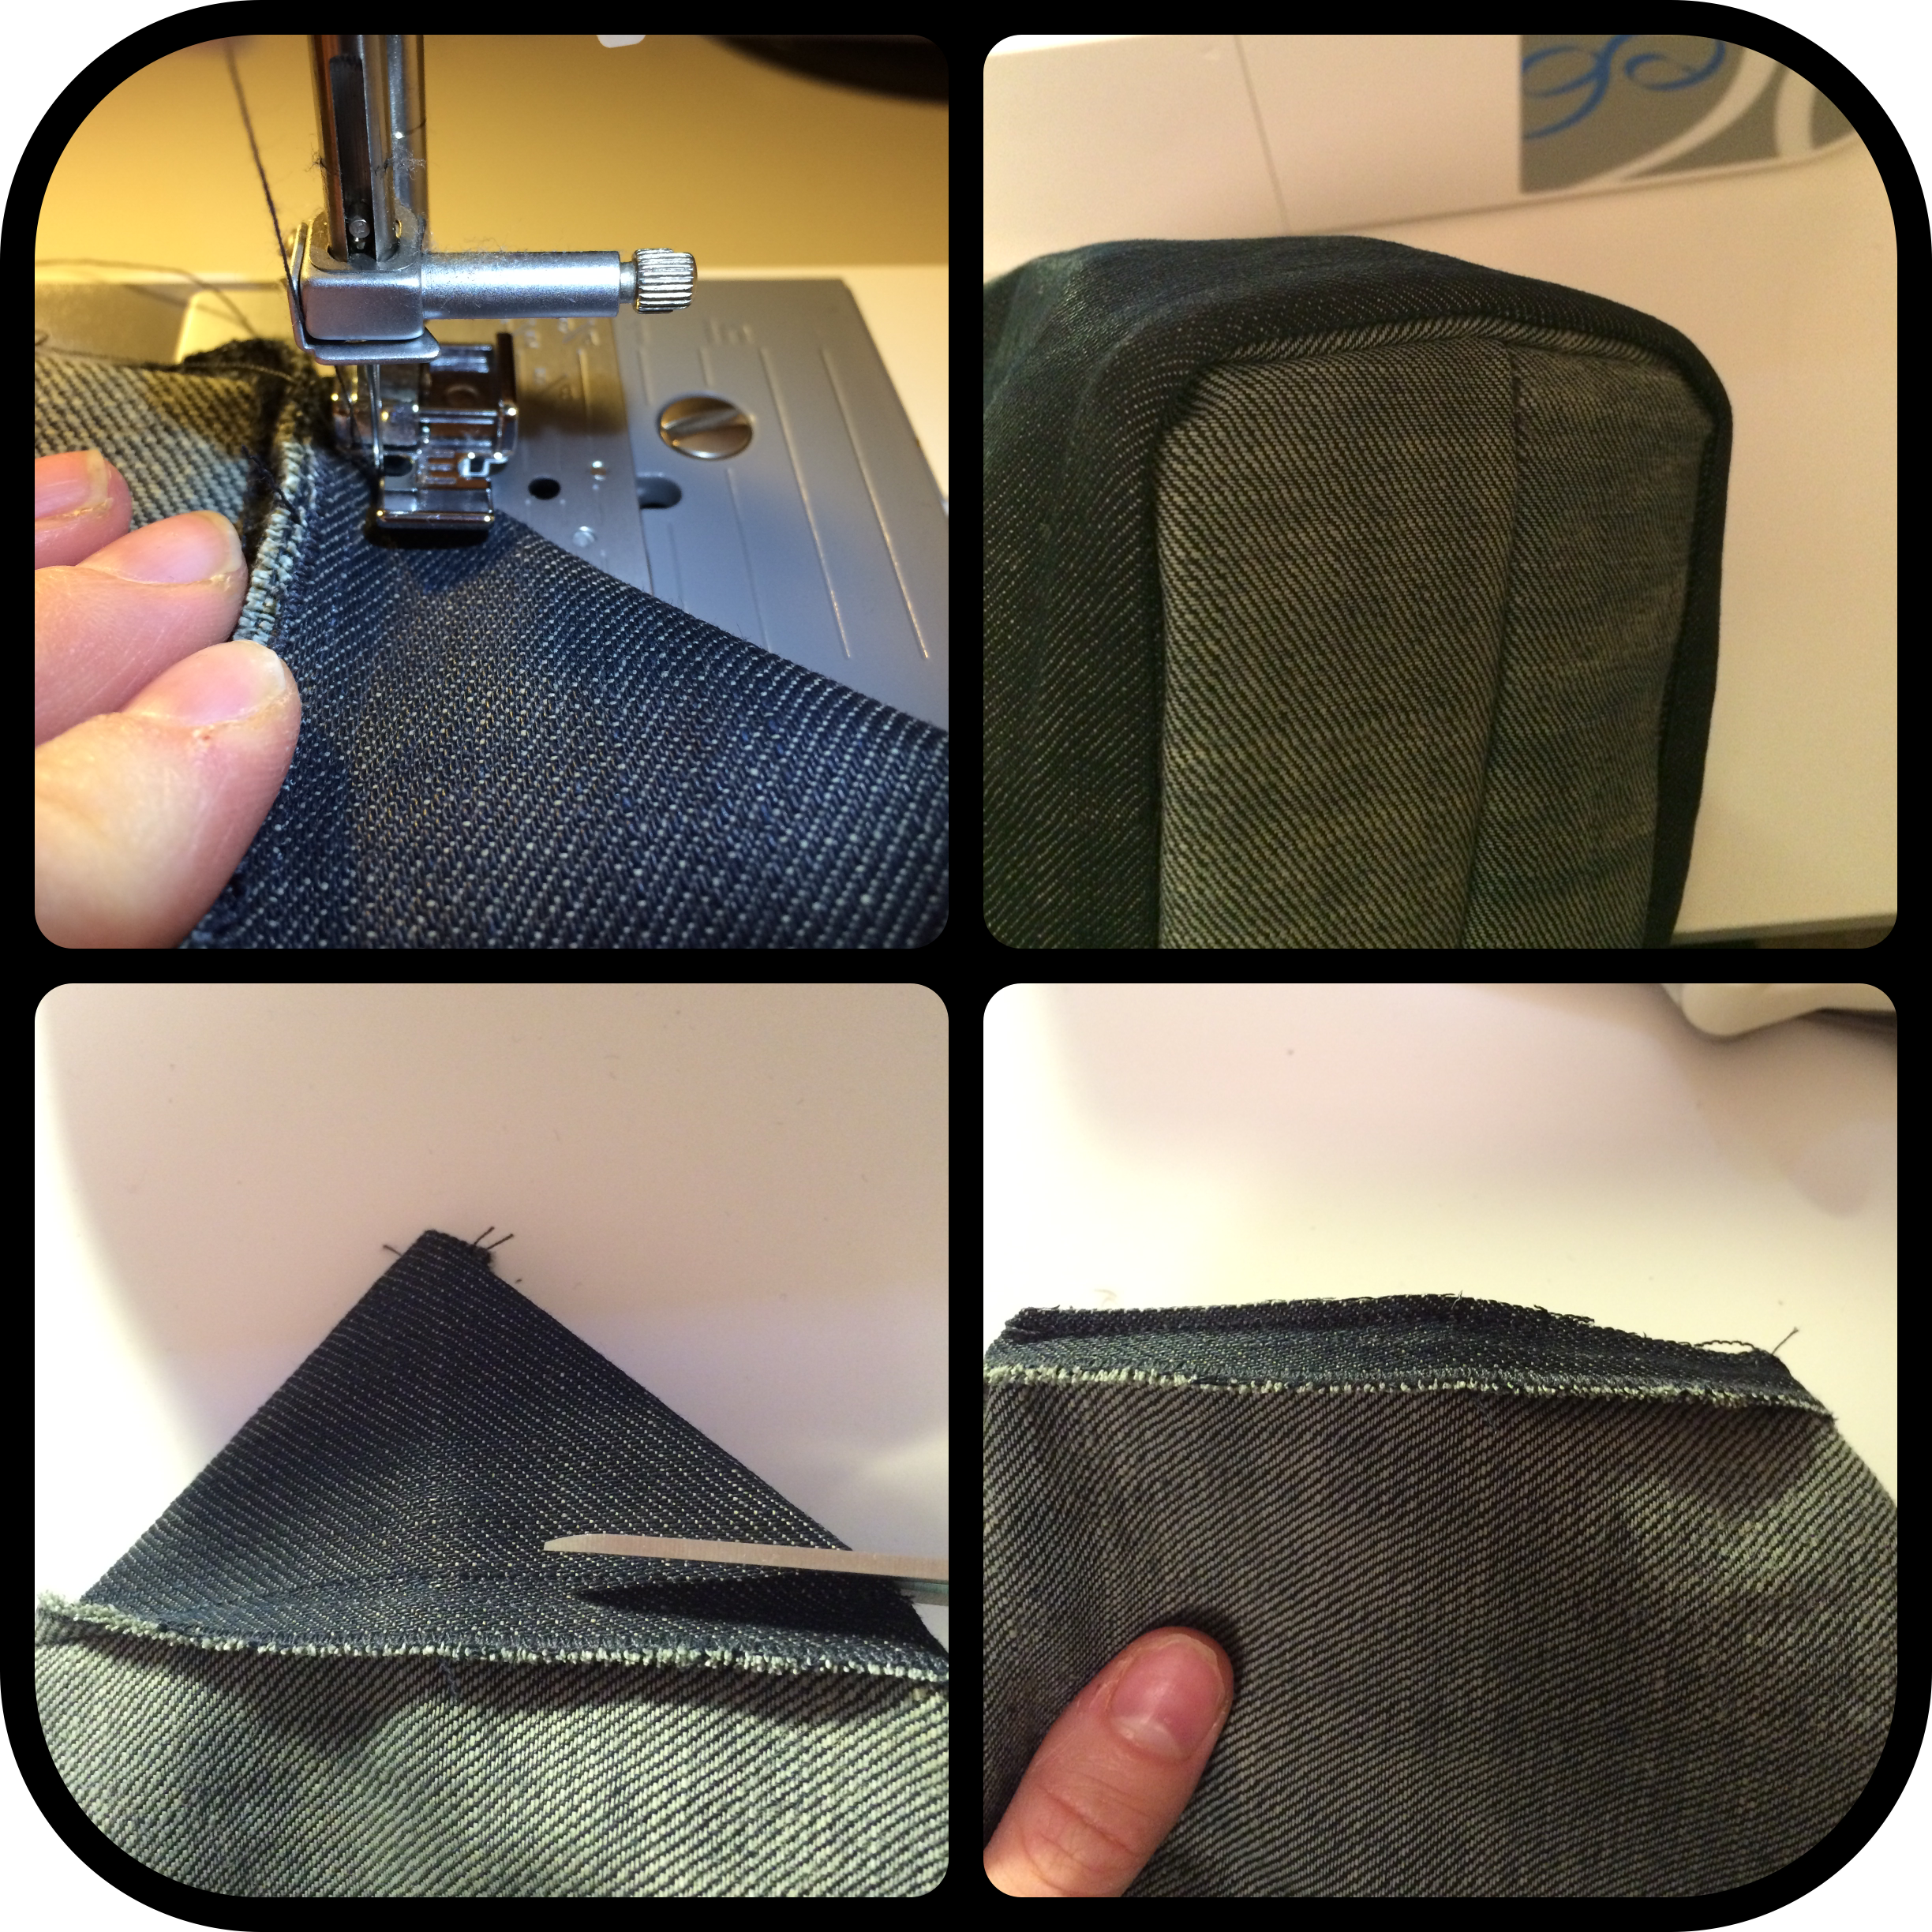
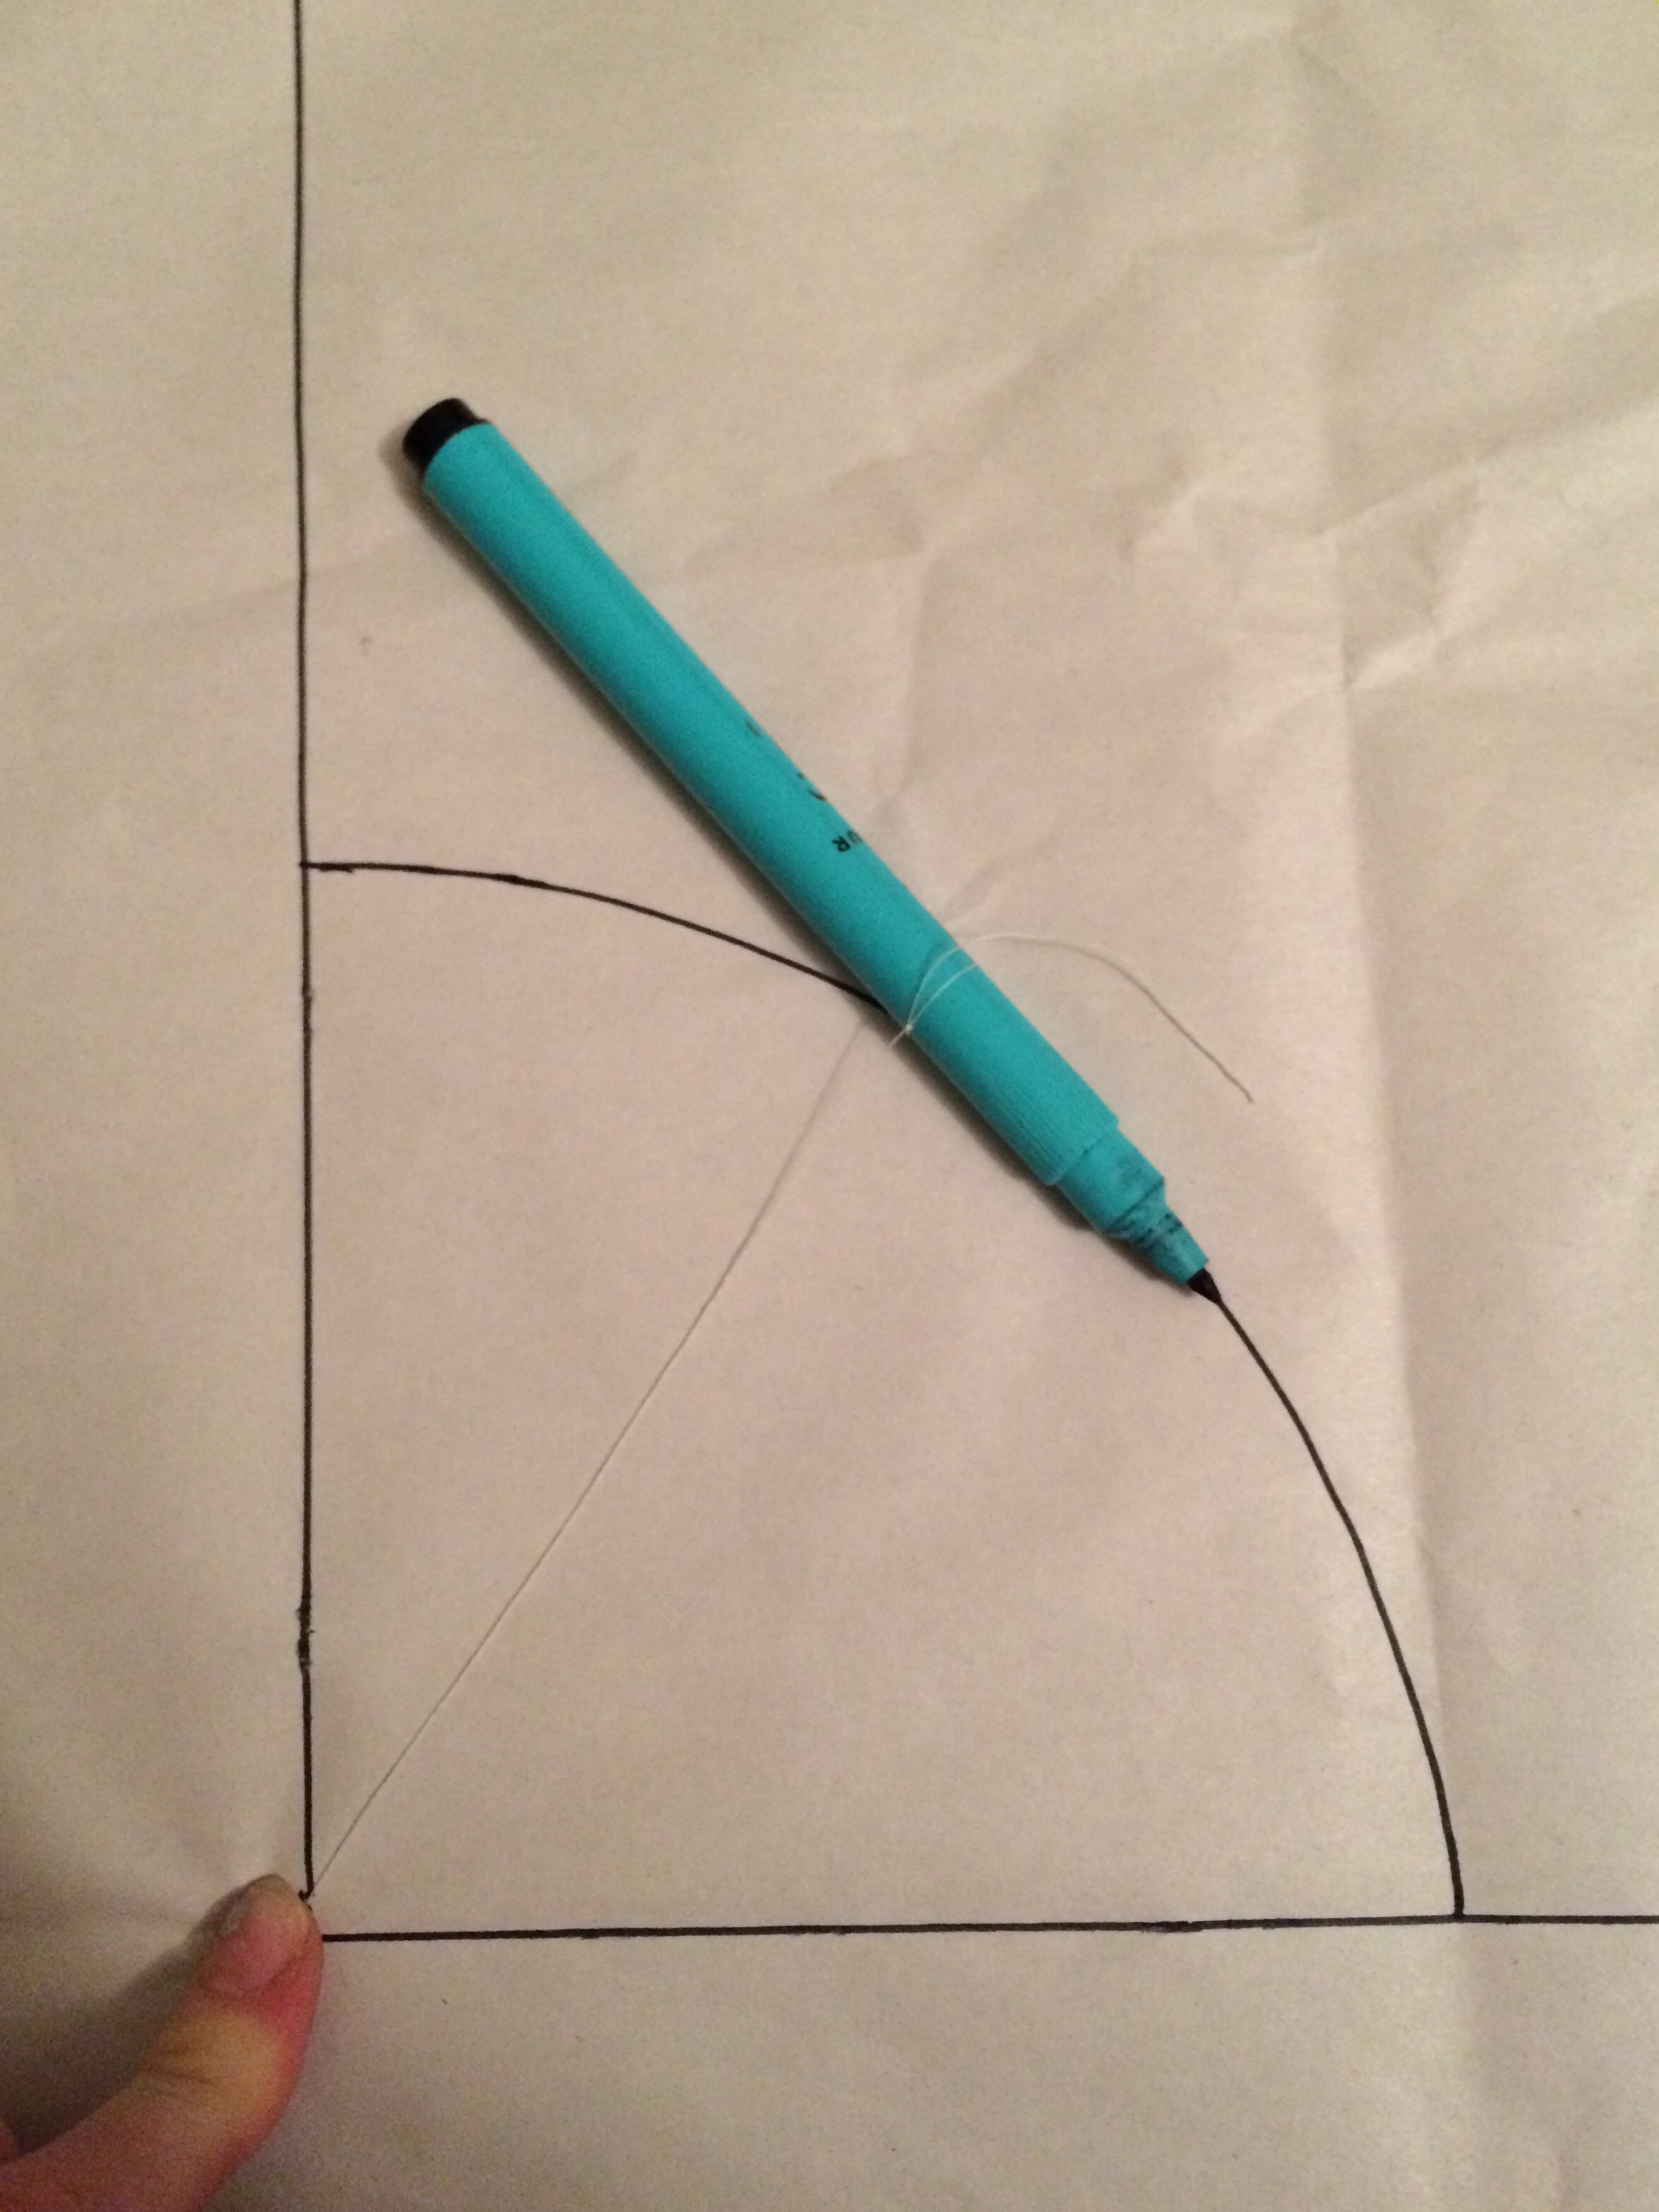
16. To make the boxed corners place your hand inside the bag and open out one corner.

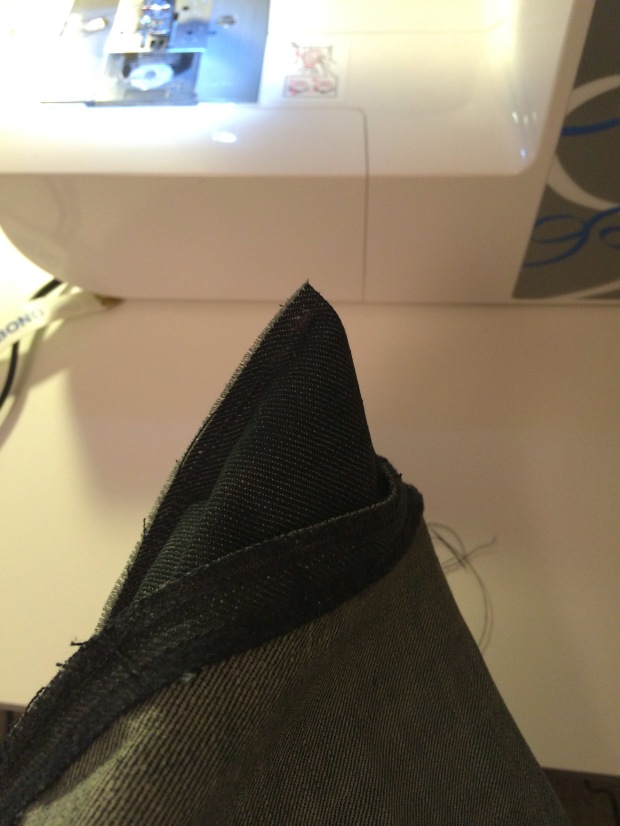
17. Line up the side seam with the centre line of the bottom of the bag and flattern to make a triangle.  Measure to desired length. This will be how large you want the bottom of your bag to be. Mine ended up being 10cm instead of the two inches pictured.

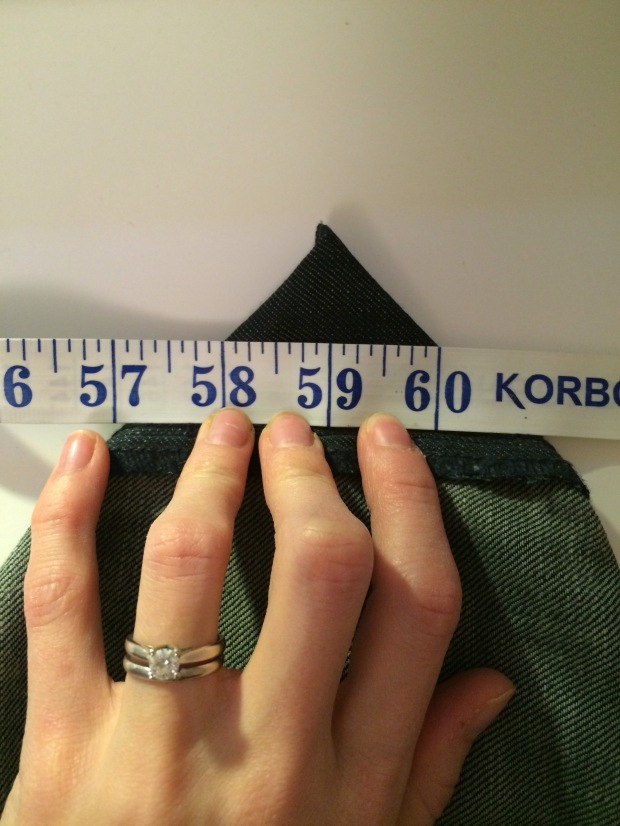
18. Pin along the line, repeat for the other side. Carefully turn right side out and check you are happy with your bag.


19.  Sew along the line with a straight stitch, I used a zipper foot to get close to the bulk of fabric. Turn right side out out and check you are happy. Cut the exces fabric off both sides and your boxed corners are done!

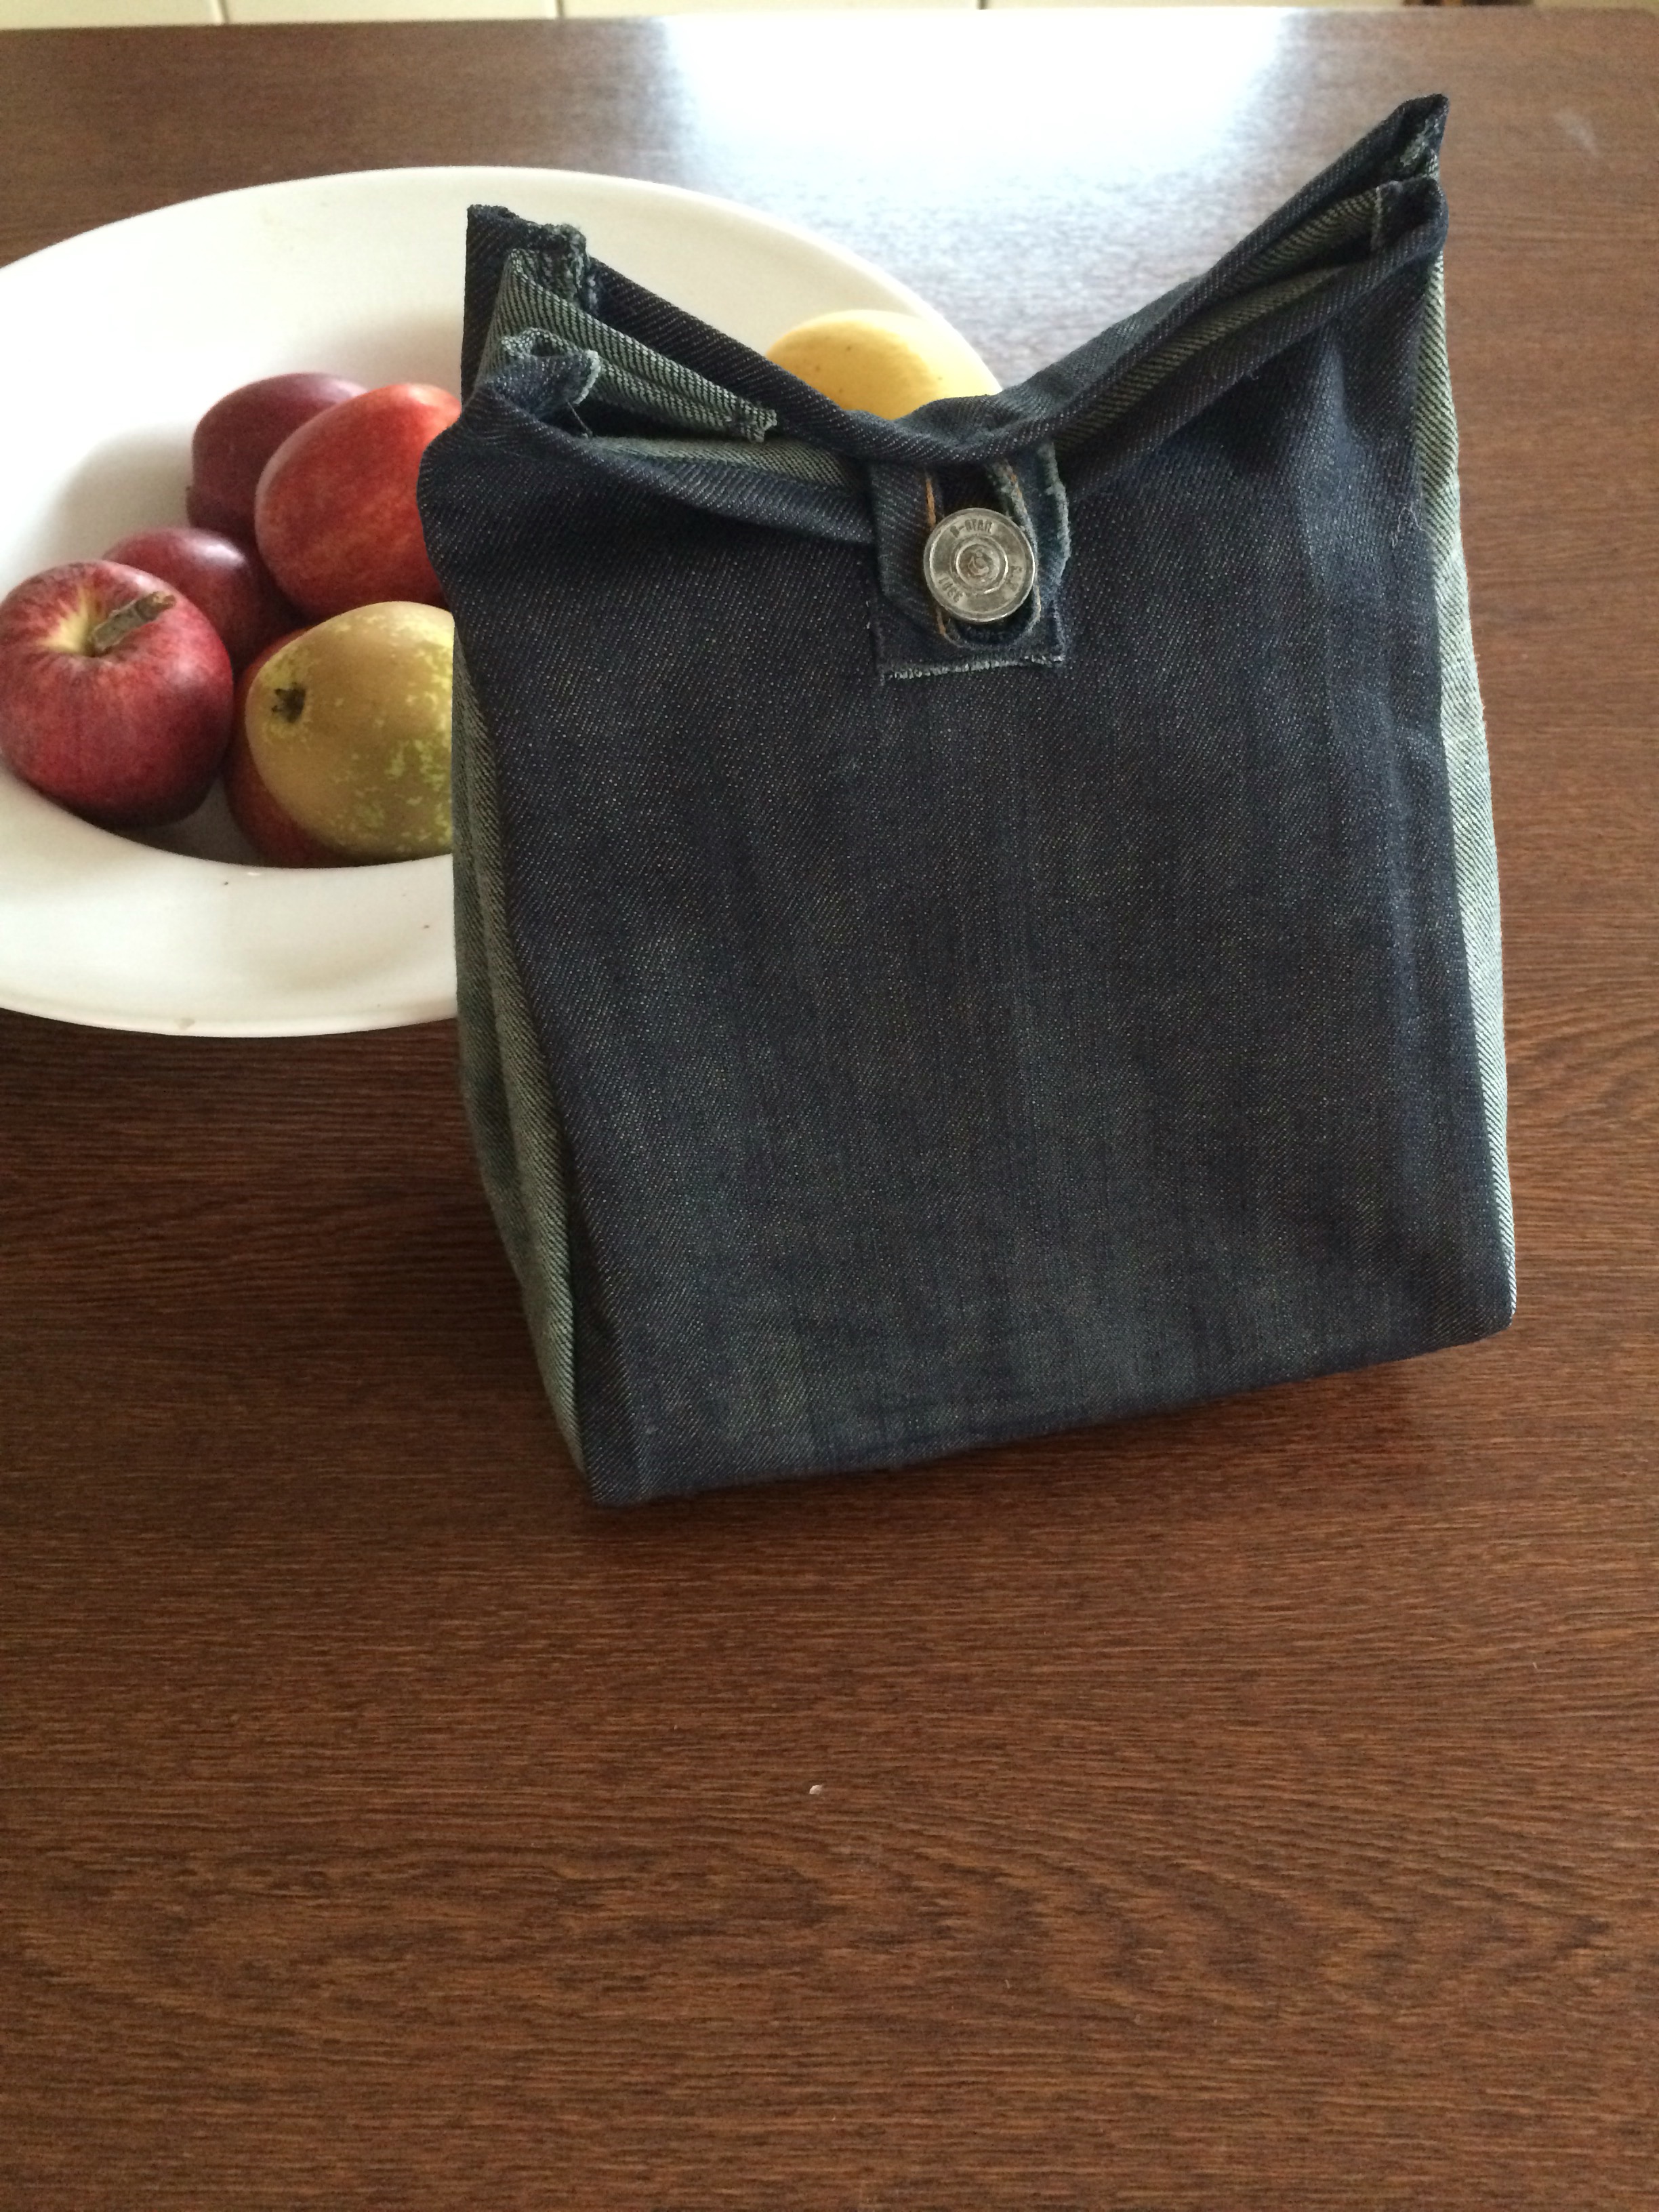
20. Turn the bag right side out, fold down the top and mark where you would like your toggle/ button to go and hand sew onto the front of the bag.  
Done!
I added a strip of cardboard the size of the bottom of the bag to make it sturdy.
I really enjoyed working with the denim. I did find it slid around a bit more than other fabric so you have to keep a tight guide on it.

As I nearly finished I realised I had some needles to use when stitching denim! Oops, can use them for my next jeans re cycle.
Box corner:  This is a great little link that demonstrates three ways to make a box corner.

Homemade clothes – skirt tutorial 

As a kid I wore homemade clothes. My Nanny was a knitter, so much so we called her Nanny Wool. My aunt sewed and knitted and my Mum still has some of my baby clothes she made for me. I love it.
So this year I’ve decided to try and make my own clothes. And for my daughter too.

I recently had a huge wardrobe clear out, 2 kids later and things don’t fit like they used to. But I hate wasting things so I’ve just ended up moving them to a box to someday do something with them.

My Pinterest board is bursting with ideas but I have no idea where to start. So I made this skirt instead.

Tutorial. 

Grab these items and a large piece of fabric of your choice!

1.  To make the pattern you’ll need a large piece paper, if you don’t have any just tape some together! Draw a vertical line then a horizontal one with a 90 degree angle. 

2. Measure your waist, where you would like the skirt to sit. Using the chart below work out the measurements needed.


To draw the radius number I tied a piece of string to a pen and measured the length required, held it on the corner and drew the arch.

3.  Next measure the length you’d like your skirt, adding half an inch for hemming. Tie another piece of string to the pen and measure the length, starting again at the corner draw another arch.

4.  Cut out the paper pattern as below. Fold your fabric in half from the bottom up, and from left to right. When you lay your pattern on the fabric you should have each straight edge along a fold.

5. Pin the pattern to the material to stop it moving about and cut it out. Open out your cut material and it should look like this:  

6. To hem the skirt you’ll need to fold a quarter inch all the way around, press with a hot iron, and then another quarter inch to hide the raw edge. I find it easier to pin a small starting section and fold and iron as you go.  (On an ironing board not the carpet!) 

7. Sew all around the outer circle. If you have a quarter inch guide foot this will help you keep even stitching. (I only folded my hem once in this picture but wished I’d done two after!)


8. To make the waistband you’ll need to measure some elastic around your waist, where you want your skirt to sit as before. Add an inch to this where you will join the two ends.

9. Overlap the elastic by the inch and sew together as in the picture below, I sewed the box first then the X and just went over the box lines again so I didn’t have to remove the needle.  

10. Cut a length of fabric the length of your waist elastic measurement PLUS 10cm to allow for the stretch.

11. Fold the strip in half right sides together so that the two short ends meet. Sew them together 1cm from the edge. Press open the seam.  
12. Lay your elastic around the waistband so that its on the wrong side of the fabric still. Fold it over to encase the elastic leaving material at the bottom to sew it closed. Pull the elastic tight as you pin around it.  

13.  Sew the waistband closed with a zig zag stitch. (If you used a guide foot remember to switch your foot back as I bent a needle before not realising you can’t do a zig zag stitch with it on) It helps to sew slowly and gently pull the elastic tight as you go.


14.  Now to join the two bits together! Mark 4 corners (I’m aware it’s a circle!) on the waistband and then on the skirt too. See the green pins.

15. Match up the green pins and pin together. Your waistband and skirt should join raw edge to raw edge.

16. I found it easier to pin from the front of the skirt. You’ll find this by laying the skirt out and pinning opposite from the waistband join. Pin towards the back from one side then the other. Any extra material will then be even at the back of the skirt.

17. Sew all around the skirt using a zig zag stitch, slowly and gently pulling the elastic tight.

18. Snip off any loose threads and it’s done!

  The skirt has lovely soft layers to it.

Now all I need it some summer sun to wear it!! ☀️

I might even make our daughter a matching one its so easy.

DIY Storage boxes 

Today was an exciting day in the Tan household. An IKEA order arrived containing furniture to enable my husband and I to use the spare room for both of our hobbies! Before this it was just the music room but now I have space to do sewing and store all my things! 😊

I had been saving washing tablet boxes for a few weeks as they are a really good size and sturdy. I also had a store of wallpaper samples I had raided from our local DIY store!

Armed with a glue gun and my freebies I decided I’d cover the boxes so I had places to keep and organise my sewing bits. As currently they are in a dented biscuit tin.


There was no method to this, more of a trial and error. When I got to the third one I’d worked out the neatest way to do the edges.

But I’m sure I will make more any way!

The top one is glittery wallpaper but you can’t really tell in the picture. They are also a different texture which is quite nice. I might make a few labels for them too.

Nappy clutch 

The idea behind this is that you can put nappies, wipes and a few bags in so you can grab everything together. If your changing bag is anything like mine it includes spare clothes, every kind of snack, drink and toy your child could possibly need whilst out!  

I find it easier to carry this under one arm and a wriggly child under the other instead of the whole bag!

How to make. 

You will need two pieces of fabric and some bias tape.

To get the right amount of fabric for the width I grabbed a full pack of wipes and a couple of nappies. Layed them on my fabric and cut extra length around. The extra length is to allow for the wipes and when filled and also for a quarter inch seam allowance.

I realise this isn’t particularly helpful for beginner sewers so my measurements were:

  • 13″ wide
  • 20″ long

Do check before you cut! Different wipe brands are slightly different sizes.

To make sure you have the width right pin one side, place wipes inside and pin the other side with them inside. Fold down the top flap to check that fits too.

Unpin and turn the fabric right sides together, re-pin and sew a quarter inch around the edges, leaving a gap to turn right side out.


Lay the material out and fold the bottom up. This will be the inside edge so we are going to use bias tape to make it look nice and neat.

You can make your own (I do) or  buy ready made. For this bias tape all you need is a strip of fabric 14″ long and 3″ wide. Fold it lengthways in half and press. Open, fold the sides in to the middle, press. Fold in half and press agsin

When it’s opened you should have three clear folded lines. Fold in the ends so the tape has neat edges and is the right size, line up the two edges and pin like in the picture above.

Once you have your bias tape pinned down I find it helpfull to use an air erasable pen and mark down the line you will be sewing every so often. Sew all the way along then fold over and hand stitch the other side.

I watched this video and it’s so clear I’ve been doing this way since the start!

Fold the bottom up, ensure its high enough to fit the nappies and wipes in. Pin around it.  

Sew around the edge a quarter inch, I did a little forward and back stitch over the flap for durability. 

I used Velcro spots to close the bag and glued them with craft glue to make sure they stay put. To get the right placement put the nappies and wipes in the bag and glue on the spots for the flap. I squashed them down under a book over night.

Fold the flap over and glue on the other spots. Put a piece of card inside the bag to stop it being glued to itself 😜


Done!!


A great baby shower gift!


Felt vegetable garden

This comes with a warning… Once you start making things out of felt it’s hard to stop!!  Such a versatile material and easy to use.


This was my first felt project and was such good fun!

It took ages to complete as the little pieces are hand sewn! Here are the tutorials I used to make it.

I got the idea from this blog. And adapted it to vegetables my son knew and are his favourite. I found another site that lists a huge range of felt vegetable tutorials, like I said this is addictive!

Sweetcorn  – this took me so long I only made one!! 

Asparagus – I used craft glue to add the detail on these.
 Carrots – I based mine on this  tutorial but used felt instead. Some of these came out very organic 😛

I based my Mushrooms on this pattern.

If you have a few days to spare have a look at this list of felt foods! 100+ felt food tutorials

Let me know what felt foods you decide to make. I’m taking a diet from felt food at the moment but I have some cupcakes and biscuits in mind to make!

In stitches

So I thought I would explain a bit more about myself and how I got into sewing.  

My blog was set up for me by my husband for my birthday. I had  recently got into cooking a bit more and trying out new recipies; hence the food part too.  But since the sewing has taken over there isn’t much time for new recipies!


I’ve decided to focus the blog on sewing projects; offering tips, tutorials and hand made products for sale. The name of the blog is also changing to In stitches. 

🔸Follow me on Instagram: in.stitches_                                                              And Twitter: in__stitches (two underscores)                                      for upcoming projects, tips and suggestions and competitions. 

A bit about me! I live in England with my husband and two children. I work in a primary school as a special educational needs assistant.  

 I got into sewing through a friend who ran a workshop to make a Christmas stocking. I loved it! The last thing I sewed must have been in high school. I remember sewing something to my duvet cover whilst sewing in bed once, and cutting through a dress I was wearing by mistake. Despite this, and with Sue’s patience, it turned out rather well! 

Sue runs sewing cafes throughout the year, they are for complete beginners or people who have been sewing for years! You can take your own projects or use one of her many patterns. Material can be provided with a collection that would make you envious for your own sewing room! There is also tea and delicious hand made cake if you can break away from your project. 

Find more details on her website Snowdrop creations.

I love re-using almost anything and being resourceful with things and money. So in 2015 I decided to make all Christmas presents. I really enjoyed it and taught myself the needed skills through you tube and tutorials. Here are a few. 

  
I hope to do the same this year, but I will be starting much earlier!

I hope my blog will inspire you to try some of your own ideas and that you can know nothing about a sewing machine and still get started!! 
Like with any hobby the collection of equipment you need grows weekly. I am always finding something I ‘need’ to add to my shopping list and collecting material to save for the right projects. 

Kids wallet 

Super easy. A good starter project to get children (or beginners) into sewing something.

 I made this for my nephew, he was very pleased with it. And with the spending money inside too. My Mum always said it was bad luck to give an empty purse or wallet!


It requires very  little fabric so can be made from left over material. The material I used is thick and durable but I would suggest using some interfacing if the material is thin to add durability.

You will need:

  • 2 pieces of material 12cm x 16cm (outside and inside)
  • 1 piece 18cm x 12cm (pocket)
  • 1 piece 14cm x 12cm (pocket)
  • Velcro spots
  1. Iron all the pieces flat.
  2. Fold the two pocket pieces in half and iron.
  3. Sew a quarter inch top stitch along both the folded edges, this gives a nice edge to the top of the pocket.
  4. Lay one of the larger pieces pattern side up, lay the larger pocket ontop so the bottom edges lines up.
  5. Repeat for the smaller pocket on top.
  6. Lay the other larger piece of fabric pattern side down, ensuring all edges are lined up.
  7. Sew around a quarter inch, ensuring you leave a gap near the top above where the pockets end (this will ensure you secure the pockets properly) so that you can turn it right side out.
  8. Turn right side out and press.
  9. Sew around a quarter inch again, ensuring you sew the gap shut.
  10. Fold the top down over the pockets so that the fold is along where the top inside pocket is. This will stop anything falling out.
  11. Press again. Glue on your Velcro spot. Done!

Afterthought: My fabric was quite bulky so I could have clipped the corner off to give more pointed corners.

Magnetic fishing game 

This was a present for our son. It was so much fun to make and took quite a while as I had some new skills to learn along the way but was very happy with the result. As was he!

I didn’t take step by step pictures as I started this before the blog but I came up with the plan myself and made it up as I went along.

To make this you will need:

  • Various coloured felt (including red and green)
  • Matching thread to thefleet
  • Scissors
  • Piece of dowling or a stick
  • String
  • Blue material for the pond
  • Length of rope
  • Strong magnets
  • Stuffing
  • Beads for fish eyes

The fish:

  1. Cut out two fish shapes from felt.
  2. Using a blanket stitch start sewing at the head and stitch around, leave a gap to stuff your fish and place your magnet in the middle of the stuffing, then sew closed.
  3. Add beads for the eyes.
  4. Do the same for all the fish, I made six.

If you are feeling creative you could make other under the sea animals!

The fishing rods:

  1. Cut a bauble shape out of red felt large enough to fit a magnet inside and allow for an eyelet in the top for the string to hang. (See picture)
  2. Cut 2 more circles of felt to go on the inside to protect the magnet, I also put sellotape around the magnet as the first ones I used smashed inside.
  3. You should have 2 bauble shapes and 2 smaller circles.
  4. Laying all the pieces ontop of each other, use a blanket stitch to sew them together.
  5. I have an eyelet making kit, they aren’t expensive and can make your project look that little bit more professional. If you don’t have one you could tie a paper clip to the end of the string and sew it inside the red felt.
  6. Using dowling with a hole in for the string, thread it through and knot. There is your fishing rod.

The play mat:

I used a very clear tutorial I found and made it to my own measurements. Find out here. What I like about this one is how neat the drawstring bit looks and it’s very simple to do. The string I had was slightly short but it meant the pond had edges to it which worked really well.

I added some lilly pads on with a simple hand stitch and we were ready to go fishing!  

Note: I wasn’t aware you could get so many types of magnets and I didn’t think about needing to check the weights they could lift! Thankfully I bought very strong ones but they were also quite brittle, hence why I used sellotape around them and added an extra layer of felt. If you know of a good brand of magnets for this type of craft please let me know!

🔹I checked the magnets could lift the fish as I went so I didn’t over stuff them.

Material basket and heat mat 

I made these two lovely pieces for my amazing Mumma. I found the butterfly material and knew it was perfect for her but took ages to decide what to make with it!

I wanted something that had a use and so that you could see the fabric. I have a collapsible bread basket so thought I’d have a go at making one that can be up all the time for jewellery, house keys or business cards.

The other one is a heat mat which is great for showing off some beautiful fabric designs.


To make the heat mat:

You will need any material, the thicker it is the more durable it will be, cut into 2 squares that will fit the base of what ever pot, pan or teapot you are making it for.

For the insulating inner later you need something called Insul Brite. It’s pretty cheap, I got mine from Sew Simple based in Wroxham Barns (UK).

Once you have cut your two fabric squares and your Insul Brite you need to layer them ready to sew.

  1. Lay one fabric square pattern side up
  2. Lay the other fabric side down ontop
  3. Lay your Insul Brite on top of both squares

Sew sround the edges with a quarter seam allowance leaving a gap to turn right side out. Once sewn and turned right side out you can slip stitch it shut, or sew around the edge again. Press when sewn.

This is a pretty simple way to do it,  but because of the Insul Brite you can sew patterns or lines ontop the same way you would a quilt, then use bias tape to seal the edges. I will explain this in another tutorial though 😀

To make the fabric basket:

You will need 2 squares of chosen fabric, these can be any size you wish depending on how large a basket you’d like.

I then cut a square of felt for the inside which will make the basket more rigid.

  1. You’ll need to layer these three in the same way as above, fabric pattern sides together and felt ontop.
  2. Sew all around with a quarter seam allowance leaving an inch gap to turn out.
  3. Turn right way around and iron.
  4. Sew around again a quarter inch making sure you sew the gap shut.
  5. Fold the whole square into a triangle and mark with an erasable pen, or pin, one inch from the  corner point, or more depending if you’d like your basket to have higher sides.
  6. Do this for all the corners then sew along that line to form the basket.

Sorry there are no pictures along the way. I wasn’t planning on doing my own tutorials but will be for some future projects.